Physical Address
304 North Cardinal St.
Dorchester Center, MA 02124
Physical Address
304 North Cardinal St.
Dorchester Center, MA 02124

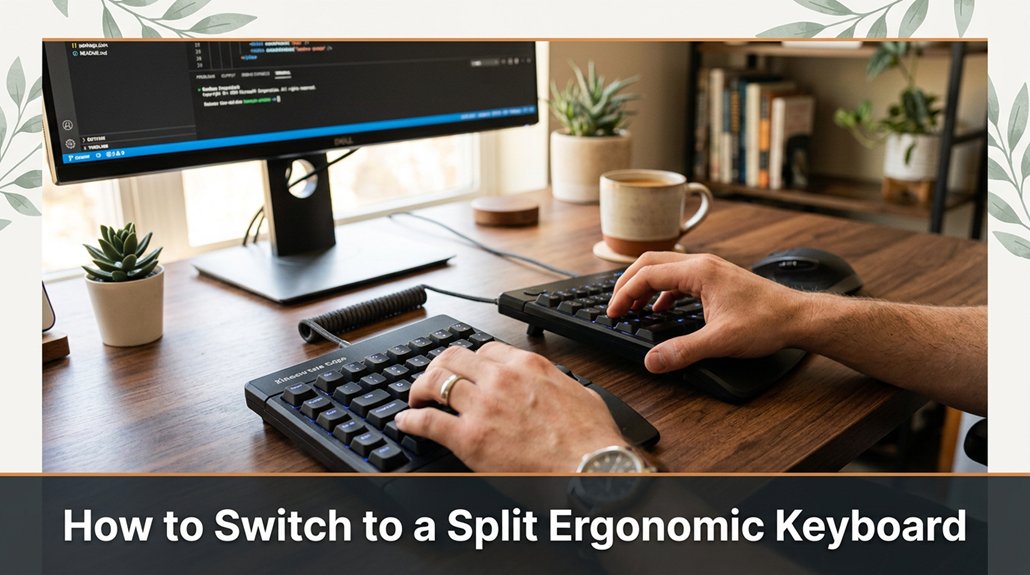
Switching to a split ergonomic keyboard can feel awkward at first, and if your setup isn’t right, you might find it more frustrating than comfortable. To get the most out of it, make sure each half is shoulder-width apart, with your elbows bent at a 90-degree angle.
Adjust the tilt so your wrists stay neutral no bending up or down. Remember, it takes patience; you’ll probably feel a bit weird initially, but fine-tuning your setup will pay off. Keep at it, and you’ll discover how to stay comfortable and pain-free all day long.
This article contains affiliate links. If you purchase through them, I may earn a small commission at no extra cost to you. I only recommend products I genuinely believe in.
Sure, a split ergonomic keyboard might seem like the latest tech fad, but the big question is whether it actually makes sense for you. If you’re willing to switch to a split keyboard, you probably spend hours on your desk feeling persistent discomfort or fatigue.
First, consider your workspace. Will splitting the keyboard give you a more natural wrist angle? Because, honestly, if you’re constantly twisting or reaching awkwardly, it might be worth it.
Evaluate your workspace to see if a split keyboard promotes a more natural, comfortable wrist position and reduces awkward reaching.
Next, look at your typing style. Do you prefer a more customizable layout? If so, a split keyboard can be tailored to your needs.
But be warned, switching to a split keyboard isn’t a magic fix. It’s a change, and change requires patience and adjustment.
Specific considerations for choosing a split ergonomic keyboard:
Highlighted Fact:
– Optimal keyboard height is where the forearms are parallel to the ground when typing, with the wrists straight, often around 17-19 inches from the floor, depending on your body size.
Common mistakes to avoid:

Even though a split keyboard might seem like the sort of ergonomic upgrade you’d only need after years of neck and shoulder pain, trust me, it actually delivers on comfort pretty quickly once you get it set up right. You’ll notice your shoulders relax because your arms aren’t forced inward. Your wrists stay straighter, which reduces strain and the annoying twinges that sneak up during long hours.
Set Up Your Split Keyboard Correctly
Benefits for Comfort and Productivity****
A split keyboard allows you to adopt a more natural typing posture, which reduces fatigue. You’ll find yourself typing longer without feeling as exhausted, revealing a secret level of comfort you didn’t realize was possible.
Key Facts
Common Mistakes to Avoid
– Mistake: Not adjusting the split to shoulder width, leading to shoulder tension.
Correction: Adjust the keyboard halves so they’re shoulder-width apart, which prevents shoulder strain caused by reaching or twisting.
– Mistake: Keeping wrists bent upward or downward during typing.
Correction: Keep wrists in a neutral, straight line with your forearms, because this reduces strain and minimizes twinges.
– Mistake: Not setting the angle of the keyboard properly, causing wrist extension.
Correction: Use a slight negative tilt (about -5 degrees) to keep wrists in a natural, relaxed position.
Once your hands settle into that perfect position, you’ll wonder why you didn’t switch earlier.
First, set your desk height so that your elbows form about a 90-degree angle when your hands rest on the keyboard, because maintaining this ergonomic angle reduces shoulder and wrist strain.
Next, support your lower back by adjusting your chair height and lumbar support, because proper back support prevents lower back pain during extended typing sessions.
Check your monitor position: raise or lower it until the top of the screen is at or just below eye level, because looking slightly down reduces cervical strain and helps maintain good posture.
Place your monitor approximately 20 to 30 inches from your face, because this distance minimizes eye strain and provides a comfortable viewing angle.
Set your mouse nearby within easy reach so you don’t have to stretch your arm uncomfortably, because close placement reduces shoulder tension and repetitive strain.
Position your wrist rest at the same height as your keyboard, because this alignment helps maintain neutral wrist posture and prevents carpal tunnel syndrome.
Make sure your joints stay relaxed and your shoulders aren’t hunching: keep your shoulders down and elbows close to your body, because this prevents muscle tension and promotes comfort during long sessions.
Additionally, consider desk posture awareness to regularly check and adjust your sitting position, ensuring your workspace remains ergonomically sound throughout your workday.
The first step is to position the split keyboard itself because, oddly enough, this isn’t as simple as plopping it onto your desk and calling it a day.
Start by spreading the two halves apart to your comfortable shoulder width. This distance varies depending on individual body proportions but typically ranges from 16 to 20 inches apart.
Make sure the halves are stable on your desk, not teetering on the edge of chaos.
Next, connect any cables or wireless receivers, because reading the tiny, confusing labels is necessary for proper setup.
Now, if your model allows, tweak the angles of each half to achieve a natural arm position this helps reduce shoulder strain. Adjust the halves so that your forearms are approximately parallel to the floor when you’re seated in an ergonomic posture.
That’s it for placement; don’t overthink the setup yet.
Key measurement:
– Shoulder width distance for split keyboard halves: 16 to 20 inches apart.
Easy, right?

When you’re finally seated comfortably in front of your split keyboard, it’s time to focus on how you sit and type because no matter how sleek your setup, bad posture will turn it into a pain factory faster than you can say “repetitive strain injury.” I know, I know you’ve probably fiddled more with angles than actually typing.
Here’s the thing: Your elbows should be at a 90-degree angle, relaxed, not tense, because this reduces shoulder strain and helps maintain comfort during prolonged typing sessions. Your wrists stay straight and neutral, avoiding bendy, uncomfortable positions that can lead to carpal tunnel syndrome.
Your monitor height should be adjusted so that the top of the screen is at or just below your eye level, because looking slightly down is less fatiguing on the cervical spine than looking straight ahead or upward.
Now, take a moment to review this:
| Posture Element | Proper Practice | Why It Matters |
|---|---|---|
| Elbows | Keep elbows close to your sides, forming a 90-degree angle | Reduces shoulder and upper back strain |
| Wrists | Keep wrists straight and neutral | Prevents repetitive strain injuries like carpal tunnel syndrome |
| Monitor height | Raise monitor until the top of the screen is at or just below your eye level | Avoids neck pain and cervical discomfort |
| Back | Support your lower back and sit upright | Keeps your spine healthy and reduces fatigue |
| Feet | Rest flat on the floor or on a footrest | Promotes stable, balanced posture |
Specific measurements or formulas:
Common mistakes and corrections:
Blocks of frustration and confusion tend to pop up when switching to a split ergonomic keyboard, almost like an uninvited guest at your favorite barbecue. You sit down, ready to type away, but suddenly everything feels off, and your hands feel awkward.
All right, first thing don’t panic. Your muscles need time to adapt because sudden changes can cause strain or discomfort.
If the keys feel misaligned, check the angle and separation because improper positioning can lead to finger fatigue and reduced accuracy. You might need to tweak those adjustments to find a comfortable position.
Now, if your wrists ache or fatigue quickly, it’s probably because your setup isn’t ideal yet. Adjust your tray height until your wrists are in a neutral position, because excessive wrist flexion or extension causes strain.
Specifically, raise or lower your keyboard tray so that your forearms are roughly parallel to the ground when typing, which maintains a neutral wrist position. Also, ensure your elbows are close to your sides, at about a 90 to 100-degree angle, to reduce shoulder tension.
Remember, it’s normal to stumble at first. Ergonomic setups take time to get used to. Keep fine-tuning your keyboard angle, separation, and your overall desk arrangement.
Important Fact:
– Position the keyboard so that the top of the keys is at or just below your elbow height when seated with relaxed shoulders.
Additionally, being aware of proper muscle adaptation techniques can help reduce discomfort as you transition.
Yes, you can use a split ergonomic keyboard with your existing desk, but a few tweaks might be needed.
All right, first, check if your desk space fits the keyboard comfortably these things come in different sizes.
Now, you’ll probably need a new wrist rest or adjust your monitor height to compensate.
Look, most split keyboards are plug-and-play, but you might’ve to reconfigure your comfort zone you’ll thank yourself later.
Split keyboards differ from other ergonomic options mainly in how they reduce wrist strain. You’ll find that they allow your hands to angle naturally, much like a handshake, avoiding the twisted wrist position most traditional keyboards force.
Other choices like curved or tented keyboards aim for comfort, but split keyboards let you customize your position precisely. Honestly, it’s like upgrading from a bike to a Harley more control, more comfort, but a little learning curve.
You’ll want to download your keyboard’s software first your manual might say “easy,” but it’s usually a half-hour treasure hunt.
Once you’re in, locate custom key mapping options often under “Key Functions” or “Macros.” Then, assign your favorite shortcuts or remap keys.
All right, remember, each brand’s different, so expect some trial and error. Don’t get frustrated; it’s more “your own magical setup,” less “DIY nightmare.”
Yes, split ergonomic keyboards usually work with all major operating systems Windows, Mac, Linux though compatibility varies slightly. You’ll want to check the manufacturer’s specs, but most use standard USB or Bluetooth, so you don’t need to worry about drivers or software, which is nice.
All right, plug it in or connect via Bluetooth, and if you run into issues, a quick firmware update or driver download solves most compatibility hiccups.
You’ll probably adjust in a week or two, but it can take longer depending on how much you type.
Expect more soreness early on that’s normal. Your brain needs to rewire, your hands need to relearn some angles.
All right, don’t rush practice a little every day. Look, the key’s patience. If you quit after a day, you’ll never get the hang of it. Stick with it, and your muscles will thank you.
Look, switching to a split ergonomic keyboard isn’t rocket science, but it’s got its quirks. Remember that one time I spent an hour tweaking the tenting angle only to realize I forgot to adjust my keyboard height? That’s the kind of thing you avoid. Stay patient, take it slow, and trust that small adjustments will make your typing more comfy and maybe even save your wrists from a future rebellion. You got this.


