Physical Address
304 North Cardinal St.
Dorchester Center, MA 02124
Physical Address
304 North Cardinal St.
Dorchester Center, MA 02124

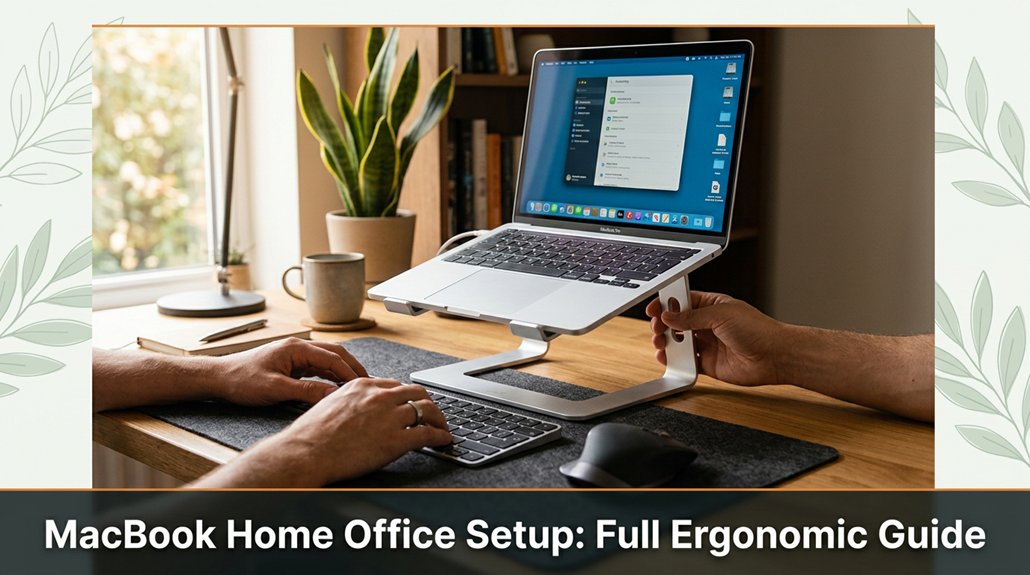
Your MacBook workspace might be wrecking your neck and shoulders without you even realizing it. Setting up an ergonomic area doesn’t have to be complicated just a few simple tweaks can make a big difference.
First, raise your MacBook with a riser or stand so the screen’s 0–15 degrees below eye level; trust me, neck cramps aren’t a good look. Make sure your external monitor sits at eye level, about 20–30 inches away.
Keep your keyboard and mouse within elbow’s reach, elbows at a 90-degree angle. And for the love of good posture, organize your zone so everything’s within a short stretch. Stick with me, and I’ll show you all the little tricks to turn that setup from frustrating to comfortable.
This article contains affiliate links. If you purchase through them, I may earn a small commission at no extra cost to you. I only recommend products I genuinely believe in.
Ever wonder if you’re actually sitting comfortably at your desk or just surviving until happy hour? That’s especially true when it comes to your MacBook home office setup.
First, check your screen height because the top of your display should be at or just below your eye level, which typically is about 20 to 30 inches from your face.
Lower the monitor until the top of the screen is at or just below your eye level because looking slightly down reduces strain on your cervical spine compared to looking straight ahead or upward.
Next, assess your chair. Do your feet rest flat on the floor? Or do you need a footrest?
The goal is to keep your knees at a 90-degree angle because this position promotes proper circulation and reduces pressure on your lower back.
Ensure that your wrists are straight when typing, not bent like a pretzel.
Maintain your wrists in a neutral position because bent wrists increase strain on the carpal tunnel area and can lead to discomfort or repetitive strain injuries.
Finally, evaluate your back. Should feel supported by the chair’s lumbar support or your ergonomic seat cushion sacrificing support can lead to poor posture and back pain.
Regularly monitor your ergonomic setup to ensure continued comfort and safety, as conditions can change over time and affect your posture.

So, you’ve decided it’s time to pick out the perfect desk and chair for your MacBook setup good call. I’m sure you’ve been there, eyeballing every wood grain, debating standing versus sitting, and wondering if you need a fancy ergonomic chair.
Here’s the thing: your desk needs to be stable enough so your keyboard and mouse don’t wobble when you’re typing furiously.
A stable desk keeps your keyboard and mouse steady, preventing wobbling and ensuring a frustration-free workspace.
Your desk should be wide enough to accommodate your MacBook and accessories. For sufficient wiggle room, aim for at least 48 inches in width.
The chair? You want something adjustable, with good lumbar support and armrests.
Don’t choose the cheapest option just because it’s on sale because comfort and posture are investments.
Trust me, your back will thank you.
Important facts for your setup:
Common Mistakes:

A good external monitor setup isn’t just about plugging in and hoping for the best it’s about lining things up so your neck doesn’t end up in a pretzel and your eyes don’t feel like they’ve run a marathon.
If your neck feels strained after working, you have set up incorrectly recheck these adjustments.
Remember that everyone’s ergonomic needs are unique; tweak your setup until it feels natural and comfortable.

Number one, it’s all about positioning your MacBook so that your eyes can comfortably look straight ahead, because looking slightly downward or upward causes neck strain over time. Raise your MacBook using a stand like the Twelve South HiRise or stack 2-3 hardcover books so that the top of the screen is at or just below your eye level specifically, your eyes should be aligned with the top third of the screen.
Key measurement:
*Position the top of your MacBook screen 0–15 degrees below eye level, roughly 20–30 inches from your face, depending on your eyesight and comfort.*
Lower the monitor to just below eye level, because looking slightly down is less fatiguing on the cervical spine than looking straight ahead or upward.
Use a separate external keyboard and mouse or trackpad placed close to your body. Keep these devices within an arm’s length to prevent reaching, which could cause shoulder and wrist strain.
Important tip:
Place your keyboard and mouse 16 to 20 inches from your MacBook, so your elbows remain close to your sides at about a 90-degree angle when typing or clicking.
Ensure your feet are flat on the floor or on a footrest if necessary, because feet supported on a stable surface promote overall posture and spinal alignment.
Supporting posture:
Support your lower back with an ergonomic chair or lumbar pillow, because maintaining the natural curve of your lower spine reduces back fatigue and discomfort.
Additionally, paying attention to your wrist positioning and using ergonomic accessories can further help alleviate strain and prevent symptoms associated with carpal tunnel syndrome.
Now, fine-tune your setup by adjusting the height until your eyes are naturally relaxed your gaze should be slightly downward, around 15–20 degrees, which is optimal for reducing eye strain.
Summary of key points:

Let’s talk about the must-have ergonomic accessories that will actually make your workday better, not just clutter your desk. You’ve probably spent ages fussing with sketches, trying to find the right height, and then realizing the bookend on your shelf isn’t quite the right riser. Well, here’s the real deal:
Take the time, get these accessories; your back, neck, and wrists will thank you later.
Building a work routine that keeps you moving and prevents stiffness involves intentional actions throughout your day. First, set a timer for every 30 minutes because periodic movement helps maintain flexibility and reduce muscle tension. When the timer goes off, stand up, stretch, or walk around for at least one minute. This habit prevents prolonged sedentary sitting that can lead to lower back pain and stiffness.
Next, incorporate quick mobility exercises into your routine. Perform neck rolls by gently rotating your head clockwise and counterclockwise for 5 repetitions each because these exercises loosen tense neck muscles. Do shoulder shrugs lift your shoulders toward your ears, hold briefly, then release for 10 repetitions to alleviate shoulder stiffness.
Include hip circles stand with feet hip-width apart and rotate hips clockwise and then counterclockwise for 10 repetitions each because these help prevent hip and lower back stiffness from prolonged sitting. Additionally, using ergonomic techniques such as correct keyboard and mouse positioning can greatly reduce repetitive strain.
Lighting can make or break your focus unless you’ve been lucky enough to stumble into the perfect setup, which I’m pretty sure no one has on the first try.
All right, here’s the thing: avoid harsh overhead lights because they cause glare and eye strain. Opt for soft, diffuse lighting, ideally a combination of a good desk lamp and natural light.
Now, balance is key. Too much brightness can tire your eyes, and too little throws you into darkness. Use adjustable lamps so you can tweak the angle and intensity, because adjustable lighting helps prevent eye fatigue by allowing you to customize illumination levels.
Position your light source behind your monitor, about 20 to 30 inches away from your face, because this reduces glare on the screen and distributes light evenly across your workspace.
Use warm light bulbs, such as 2700K to 3000K color temperature, for comfort and to minimize blue light exposure that can disrupt sleep cycles.
Limit screen glare by using matte screens or filters, and keep ambient light consistent throughout the day to prevent abrupt brightness changes that strain your eyes.
Highlighted Fact:
– Keep ambient light level consistent, ideally around 300 to 500 lux, to reduce eye fatigue caused by frequent light adjustments.
Common mistakes and corrections:
When it comes to organizing your workspace for maximum focus and efficiency, the goal is clear: keep clutter off your desk and everything within reach. You want to avoid hunting for your mouse or notebook every time.
Here’s a quick setup tip: organize your essentials in zones tech, notes, and supplies.
| Zone | Items |
|---|---|
| Tech | MacBook Air, Logitech MX Master 3 mouse, Anker 60W charger |
| Notes | Moleskine Cahier notebook, Fisher Space Pen, Post-it Super Sticky notes |
| Supplies | Paperclips, Bose QuietComfort 35 headphones, Samsung T7 external SSD |
Place your monitor arm, such as the Ergotron LX or Autonomous MX-100, in a position that does not block your workspace because obstructing your workspace can reduce efficiency and cause unnecessary strain. Raise or lower the monitor until the top edge is at or just below your eye level, approximately 20 to 30 inches from your face, to reduce neck strain and promote better posture.
Ensure the items you use most frequently are within easy reach. For example, position your keyboard, mouse, and notepad on your primary work zone (centered in front of you).
Rearrange your workspace so that high-use objects are located within a 15-inch radius from your seated position, because reaching beyond this distance increases fatigue and decreases productivity.
Remember the following essential measurements:
Height of monitor: Top of the screen at or just below eye level, approximately 20–30 inches from your face.
Distance from monitor: 20–30 inches, depending on screen size and resolution, to prevent eye fatigue and promote clarity.
Arm reach zone: 15 inches radius from your seated position for most frequently used tools.
A common trap in home office setups is ignoring how your body actually fits into the space, and then paying for it with aches or fatigue.
You might’ve spent 20 minutes adjusting your chair and still wake up with a sore neck.
All right, here’s the deal: First, make sure your monitor is at eye level because looking slightly downward reduces strain on your cervical spine. Raise the monitor until the top of the screen is at or just below your eye level.
Next, keep your keyboard and mouse close enough that your elbows stay relaxed at about a 90-degree angle because this position minimizes shoulder strain. Measure your elbow height; position the keyboard and mouse so that your elbows are at or just below this height.
Then, check your chair’s lumbar support because if it’s not comfortable, it’s just a fancy headrest. Adjust or add lumbar support so that your lower back maintains its natural inward curve.
Finally, move your feet flat on the floor, not dangling or perched on a footrest that’s too high, because this promotes proper circulation and lumbar support. Keep your feet positioned so that your knees are at a 90-degree angle and your feet are fully supported.
Note:
Monitor height formula: Top of the monitor should be at or just below eye level, approximately 20 to 30 inches from your face.
Common ergonomic mistakes include:
To customize your MacBook’s performance for ergonomic comfort, start by adjusting your display brightness and keyboard backlight to reduce eye and hand strain.
All right, next, tweak your system’s energy settings to prevent unnecessary slowdown. Honestly, you’ll find that disabling or optimizing background apps frees up resources, making your Mac feel snappier.
Turn on ‘Night Shift’ your eyes will thank you. Remember, a well-tuned Mac boosts comfort and efficiency.
You need cable clips, zip ties, and a cable sleeve trust me, your future self will thank you.
All right, start by bundling cords together with zip ties, then slide them into a cable sleeve to hide the mess.
Stick clips along your desk edge or behind the monitor for quick routing.
Here’s the thing: don’t over-tighten clips or you’ll crush your cords.
Done right, your workspace stays tidy, stress-free, and actually usable.
You should take a break every 20-30 minutes during long MacBook sessions. Sure, you’re busy, but your eyes, neck, and wrists aren’t.
Look, the Pomodoro technique isn’t just a fancy word it’s your friend. Stand up, stretch, look away for a few seconds. Trust me, it keeps your focus sharp and your body from throwing a tantrum later.
You’ve got this, just don’t forget to breathe.
All right, you need specific ergonomic accessories for your MacBook Pro? Well, a quality laptop stand is your first bet keeps your screen at eye level without straining your neck.
Pair that with an external keyboard and mouse; you’ll thank yourself later.
Obviously, a good ergonomic chair helps, but don’t skimp on the wrist rests or a supportive lap pad.
Just remember your setup should feel natural, not like you’re trying to disarm a bomb.
You can reduce eye strain by adjusting your display brightness to match your room’s ambient light no one wants a blinding screen or a dim haze.
Enable Dark Mode; it cuts glare and makes texts easier on your eyes.
Turn on True Tone; it automatically adjusts color temperature based on your environment.
And obviously, take regular breaks your eyes aren’t meant to stare at screens nonstop, even if your productivity depends on it.
Alright, so you’ve set up your MacBook and maybe bumped into a few surprises like a monitor arm that refuses to clamp or a chair that’s more “sore spot” than “supportive.” But now, you’re practically living at your desk, avoiding neck cramps and eye strain. Trust me, once you get the routine down adjusting your setup, staying active you’ll wonder how you ever worked without these tweaks. Happy working comfortably, finally.


