Physical Address
304 North Cardinal St.
Dorchester Center, MA 02124
Physical Address
304 North Cardinal St.
Dorchester Center, MA 02124

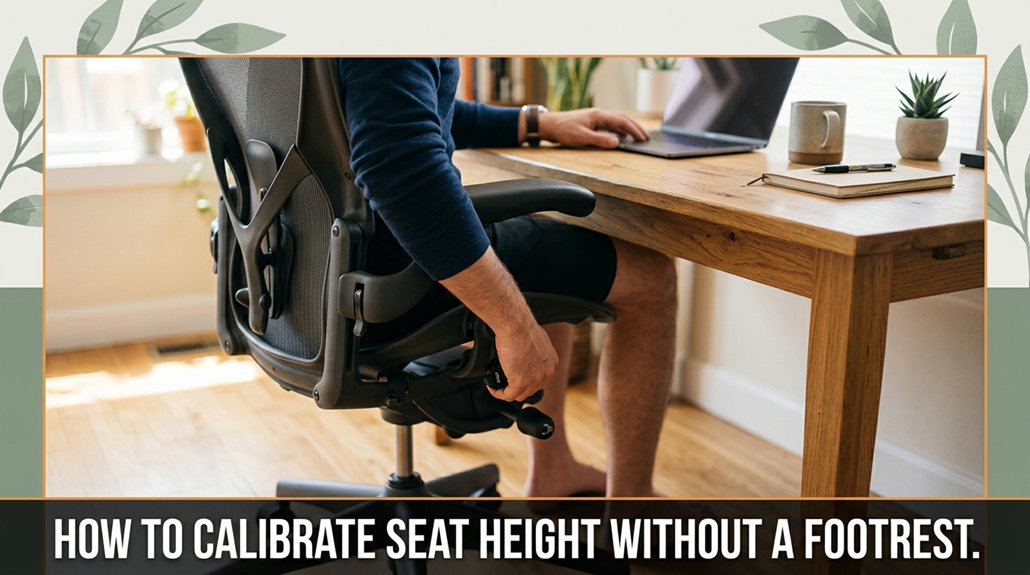
Tired of uneven seating or aching knees after a long day at your desk? You don’t need fancy accessories to get your seat height just right. Sit down with your feet flat on the floor that’s step one and check if your knees are at a 90-degree angle.
If they aren’t, raise or lower your chair until they are, leaning back slightly to keep your posture neutral. Ideally, your hips should be level with or slightly higher than your knees. If you don’t have a footrest, you can stack a few books or fold a towel under your feet to achieve this.
Stay comfortable, avoid dangling your feet, and keep them firmly planted things many folks forget until they start to squirm after hours. Want to learn more about fine-tuning your setup? Keep going there’s always more to explore.
This article contains affiliate links. If you purchase through them, I may earn a small commission at no extra cost to you. I only recommend products I genuinely believe in.
Alright, let’s get real about evaluating your current seat height, because if you just eyeball it and hope for the best, you’ll probably end up with a sore back or numb legs by lunchtime.
If your chair height doesn’t include a footrest, it’s even trickier.
Without a footrest, finding the right chair height becomes even more important for comfort and support.
First, sit comfortably with your feet flat on the floor because maintaining proper foot contact ensures good circulation and balance.
Your knees should form roughly a 90-degree angle no jamming or dangling, because this position promotes better posture and reduces strain.
Look at how high your seat is in relation to your hips: if it’s too low or high, your posture suffers.
Adjust the seat height accordingly and test again because proper alignment prevents unnecessary stress on your lower back and hips.
Highlighted fact:
Optimal seat height is when your knees are at a 90-degree angle with your feet flat on the floor, and your thighs are parallel to the ground.
To further enhance comfort, consider using ergonomic principles to fine-tune your seat position for sustained support.

Your desk height and layout can make or break your seat adjustment efforts. No matter how perfect your chair is, if your desk is a foot too high or too low, you’re fighting an uphill battle.
Take a look at how your setup is working for you:
| Aspect | Ideal Setup | Common Issue |
|---|---|---|
| Desk height | Elbows bent at about 90 degrees, wrists straight, with forearms parallel to the floor | Desk too high causes shoulder elevation; too low causes slouching and strain |
| Monitor position | Top of screen at or just below eye level, approximately 20-30 inches from your face | Looking down causes neck strain; looking up causes fatigue |
| Keyboard placement | Keyboard positioned close enough so elbows stay near your sides, about 1 to 2 inches from your body | Reaching causes shoulder pain and increases strain, which can be avoided by proper placement |
| Leg clearance | Knees slightly lower than hips, with at least 2-4 inches of space beneath the desk | Cramped thighs or ankles from insufficient space; ensure adequate legroom for comfort |
| Layout flow | Everything within easy reach, arranged to minimize excessive reaching or clutter | Excessive reaching leads to shoulder and back strain; keep frequently used items nearby |
Important measurements and guidelines:
Common setup mistakes with specific issues:
There’s no reason your seat should feel like a throne of discomfort. I’m sure you’ve been 45 minutes into adjusting, wondering if your chair secretly hates you.
Here’s the thing: you want your feet flat on the floor no dangling toes and your knees at about a 90-degree angle.
Adjust the seat height so your hips are level or slightly higher than your knees, because this promotes proper spinal alignment and reduces pressure on your lower back.
Stand in front of your chair and raise or lower the seat until your thighs are parallel to the floor or slightly declined, with your feet resting flat on the floor.
Highlight:
*Seat height should position hips level with or slightly above the knees, with feet flat on the floor.*
Sit forward a bit comfortable but not hunched and see if your lower back feels supported.
If it doesn’t, tweak the height slightly until you feel balanced and supported.
Keep adjusting until you feel like you could sit here all day without nagging pain or feeling like the chair’s trying to push you off.
Remember, optimal comfort and posture result from precise adjustments. A good rule of thumb is to set your seat height so your thighs are roughly parallel to the ground and your knees are at a 90-degree angle when seated.
Common mistake:
*Slouching or leaning back excessively* which happens when the chair height is too high or too low, causing unsupported lumbar curvature.
Instead, adjust the seat so your lower back naturally curves against the chair’s lumbar support, or consider adding a lumbar pillow if needed.
In addition, ensure your chair’s backrest can be angled properly to support the natural lumbar curve, which is crucial for maintaining lower back health.

Sometimes, you need to check your foot placement to make certain you’re actually sitting correctly, not just guessing from how it feels. First, sit back and loosen up; don’t hover or stretch your legs. Then, plant your feet flat on the ground because this provides stability and proper weight distribution. Now, check the angle ideally, your knees should be roughly at a 90-degree bend because this helps maintain proper circulation and reduces strain. Make sure your feet are shoulder-width apart for stability no duck-footed disaster here. Here’s the thing: the best position depends on your height, desk setup, and chair.
Key measurement:
– The angle between your thighs and lower legs should be approximately 90 degrees.

Adjusting your seat height isn’t brain surgery, but it does require a touch of finesse, like balancing on a tightrope, only with less danger and more back pain if you get it wrong. Proper spinal alignment is key to maintaining a healthy and sustainable posture during long hours at your desk.
Now, you want to sit so your feet are flat, knees are at roughly 90 degrees, and your hips are open enough to avoid a hip cramp. Use your body as a guide.
Sit with feet flat, knees at 90 degrees, and hips open to stay comfortable and avoid cramping.
Lean back, sit up straight, and check that your elbows rest comfortably on your desk because this ensures proper arm support and reduces shoulder strain. If you’re slouching forward or craning your neck, you’re off.
Step 1: Sit with your feet flat on the floor because this promotes even weight distribution and stabilizes your lower back.
Step 2: Adjust your seat height so that your knees are approximately 90 degrees because this helps maintain proper circulation and reduces lower back stress.
Step 3: Ensure your hips are open enough to prevent hip cramping, which can occur if the seat height is too high or low.
Step 4: Lean back slightly and sit up straight to assess your posture because a neutral spine reduces strain on your back and neck.
Step 5: Rest your elbows comfortably on your desk because this supports your arms and relieves shoulder tension. If your elbows don’t rest comfortably, adjust your seat height or desk position.
Step 6: Check for slouching or craning your neck. If you notice these, readjust your chair or monitor angle to maintain a proper ergonomic posture.
Tip: Keep it simple: be honest with how your body feels in this position. Trust your body’s signals rather than eyeballing or blindly following the manual. Proper adjustments now will help you avoid pain later.
The biggest mistake you can make when adjusting your seat height without a footrest is assuming one size fits all because, frankly, your legs won’t thank you if you get it wrong. You might think, “Hey, just set it at this arbitrary height,” but that’s where most go wrong.
Quick test: Adjust your seat until your feet are flat on the floor, your knees are at a 90-degree angle, and your shoulders are relaxed because this ensures proper posture and reduces fatigue.
Specific measurements to reference:
Common mistakes when adjusting seat height without a footrest:
– Additionally, considering the ergonomic principles such as proper keyboard and mouse positioning can greatly enhance comfort and reduce strain during long sitting periods.
This method ensures your seating is ergonomically optimized even without a footrest, promoting comfort and long-term spinal health.
If you don’t have a traditional footrest lying around, don’t worry there are plenty of creative ways to give your feet the support they need without spending a dime. You probably already own items that work. A sturdy stack of books is perfect because it provides stable support. Just make sure the stack is sturdy enough not to tumble when you shift your weight.
Use a stack of books or a folded towel to elevate your feet and support good posture naturally.
Alternatively, grab a small box, because it should be firm and steady to prevent wobbling. If you’re feeling fancy, a folded towel or a rolled-up sweatshirt works in a pinch because they can conform to the shape of your feet and provide comfortable elevation.
The key is to keep your feet flat on the support surface and your knees at approximately a 90-degree angle. To achieve this, measure the height from the floor to the bottom of your kneecap; your footrest should be roughly equal to this measurement.
Now, check your posture. If your feet are dangling, your back might suffer because dangling feet cause improper weight distribution and strain on the lower back. Ensure your feet are supported enough so your thighs are parallel to the ground and your lower back maintains the natural lumbar curve.
Getting your seat height right isn’t just a one-and-done deal; it’s an ongoing test to ensure you stay comfortable after marathon work sessions or Netflix marathons.
Here’s what you do: Sit down, plant your feet firmly on the ground, because this helps stabilize your posture. Check if your knees are roughly at a 90-degree angle this supports proper ergonomic alignment. If not, adjust the seat height accordingly.
Now, look at your feet are they resting comfortably on the floor? If your feet are dangling or scraping the floor, tweak the seat height again.
Measurement Fact:
– Seat height should be adjusted so that when seated, your knees are at approximately a 90-degree angle, with your feet flat on the floor.
Following these steps will help maintain comfort and ergonomic correctness during long periods of sitting, preventing common issues like hip strain, back pain, and circulation problems.
When you’re sharing a workspace or swapping out chairs like they’re seasonal clothing, adjusting your seat height becomes more complex and more important than just a quick twist of a knob.
I’m sure you’ve been 45 minutes into assembling something when you realize step 4 assumed something step 2 never told you.
First, sit down in the new chair because proper seating starts with a stable position. Adjust the height so your feet are flat on the floor because this promotes spinal alignment and reduces pressure on your thighs.
Start by sitting securely and set the height so your feet rest flat for better posture and comfort.
Check if your knees are about a 90-degree angle because this position optimizes circulation and reduces strain on your lower back. If your knees aren’t at this angle, tweak the seat height again.
Here’s a critical point: different chairs use different mechanisms. Some rely on levers, others on knobs.
Remember, comfort takes precedence over strict adherence to ideal measurements. If your setup feels good your back feels supported, and your wrists are neutral then you’ve achieved optimal ergonomics, even if it doesn’t match textbook guidelines.
Key measurement:
– The top of your monitor should be at or just below eye level, approximately 20-30 inches from your face, to prevent neck strain and promote good posture.
In addition, ensure your hips are just slightly higher than your knees and that your feet are flat on the ground because this position minimizes lumbar pressure and encourages proper spinal alignment.
Common Mistake to Avoid:
Ever notice how your workspace seems to change just when you finally get everything dialed in? It’s like your chair secretly shrinks or your desk moves, or something. That’s when you need to reassess.
Here’s what to watch for:
All right, don’t wait until your back complains or your wrists start aching. Check your seat height because an improper setting can cause discomfort or injury.
How to reassess your seat height:
Check your workspace every few months or after significant changes such as switching to a new desk, chair, or monitor setup.
Troubleshooting common ergonomic issues is rarely as straightforward as flipping a switch, and let’s face it, if it were, we’d all be working in perfect comfort already. You prop up your laptop, and suddenly your neck feels like it’s on a solo expedition.
First, check your monitor height because keeping your monitor at the correct height reduces neck strain and enhances overall comfort. Raise the monitor until the top of the screen is at or just below your eye level because looking slightly down is less fatiguing on the cervical spine than looking straight ahead or upward.
Next, position your monitor 20 to 30 inches away from your face because this distance minimizes eye strain and allows for a comfortable viewing angle.
Adjust your seat height so your eyes are roughly level with the top of the screen because this positioning helps maintain proper neck alignment and reduces hunching.
If your back hurts or your shoulders are tense, you might need more lumbar support or a better chair altogether. Proper lumbar support maintains the natural curve of your lower back and prevents slouching.
Ensure your chair has adjustable lumbar support, and set it so it comfortably fills the curve of your lower back.
Sometimes, the issue isn’t the chair but your habits. When pain persists despite these adjustments, that’s your cue to seek professional ergonomic help because persistent discomfort can indicate underlying issues that require expert assessment and intervention.
Yes, you can use household items to help calibrate your seat height. Grab a sturdy box, thick book, or cushion something that can mimic a footrest without slipping.
Put it under your feet, then sit down and see if your knees stay at about a 90-degree angle. Adjust the height until your thighs are parallel to the floor.
Just be sure whatever you pick is stable nothing’s worse than a wobbling foot.
You should recheck your seat height every few weeks or when your posture feels off that’s about the sweet spot.
Honestly, it’s like tuning a guitar; if you scale it too long or short, it messes with everything.
Sometimes, after a long day, you might notice things shift.
So, set a reminder to check, especially if you move your desk around or notice discomfort.
Better safe than back pain.
Remember, “if it ain’t broke, don’t fix it” but signs your seat’s off?
You’ll feel like your hips are cranking, your knees are too high or too low, or your feet won’t sit flat. Your back aches, or your posture feels strained.
If your chair’s making your body scream, it’s a dead giveaway. Adjust it until your feet rest flat, thighs are parallel, and your back stays comfy.
You find the lever under your chair usually on the right side. Pull it up, then use your body weight or lift your butt slightly to raise the seat.
Release the lever once it’s at your preferred height your thighs should be parallel to the ground.
All right, don’t overthink it; just a quick tweak, and you’re set. Remember, it’s about comfort, not mind-boggling precision.
All right, you don’t need a fancy cushion, just a rolled-up towel or foam pad.
Why? Because it makes your seat height customizable without buying extra stuff. Just slip it underneath your butt before sitting down.
Obviously, choose something firm but comfortable. You want your hips at about a 90-degree angle for good posture.
That’s it simple, cheap, and effective, even if your desk pushes for an awkward height.
All right, so here’s the deal: calibrating your seat height without a footrest might seem tricky, but honestly, once you find that sweet spot, your back and knees will thank you. Did you know studies show proper seating reduces discomfort by up to 70%? That’s a game-changer. So, take your time, tweak a little, and don’t be afraid to recheck every now and then your future self will thank you during that marathon Zoom call.


