Physical Address
304 North Cardinal St.
Dorchester Center, MA 02124
Physical Address
304 North Cardinal St.
Dorchester Center, MA 02124

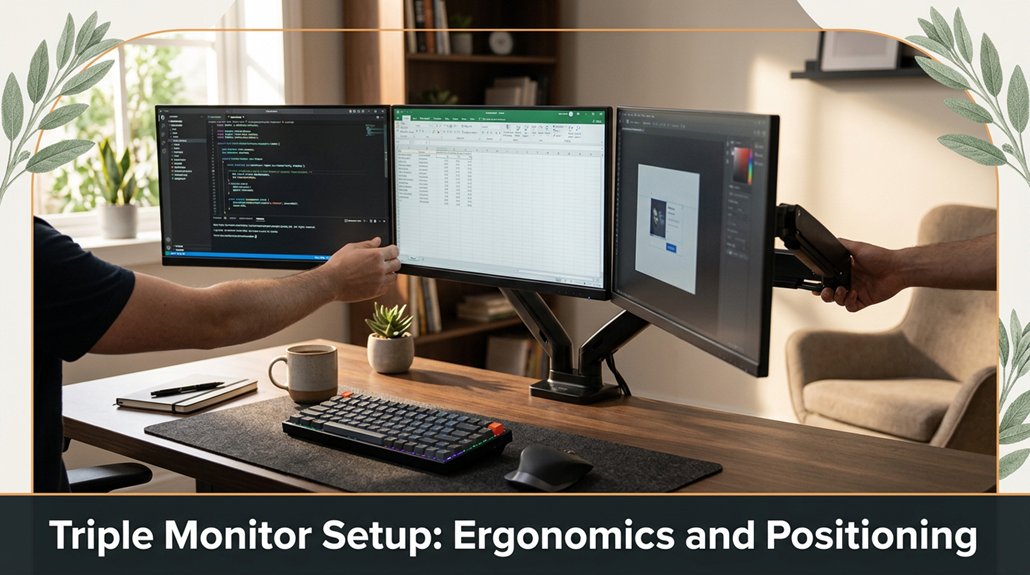
Setting up a triple monitor setup can feel overwhelming, especially when you want to stay comfortable and avoid neck strain. If your eyes are darting between screens all day or you’re constantly adjusting your position, you’re not alone and there are simple adjustments that can make a big difference. The key is positioning your main monitor directly in front at eye level and keeping everything properly aligned. With a bit of attention to angle and height, you’ll stay more relaxed and productive, and you might even wonder why you didn’t do this sooner.
This article contains affiliate links. If you purchase through them, I may earn a small commission at no extra cost to you. I only recommend products I genuinely believe in.
Let’s be honest: setting up a multi-monitor workspace isn’t exactly a walk in the park, especially if you’re aiming for good ergonomics.
When it comes to triple monitor setup ergonomics, everything hinges on placement. You want your main monitor directly in front of you because this minimizes neck strain and maintains proper visual focus.
Position the main monitor at a distance of approximately 20 to 30 inches from your face, so your eyes are naturally aligned with the top third of the screen.
The side monitors shouldn’t be awkwardly twisted; a slight angle of about 15 to 20 degrees is sufficient because it reduces neck rotation and maintains a comfortable viewing angle.
All monitors should be adjusted so that the top of each screen is at or just below your eye level because looking slightly downward is less fatiguing on the cervical spine than looking straight ahead or upward.
Raise each monitor to this height by using adjustable monitor arms, such as those from Ergotron or Humanscale, which provide precise height and angle adjustments because they help achieve optimal ergonomic alignment.
Lower the monitor to just below eye level, because looking slightly downward minimizes neck strain and maintains a natural head posture.
Ensure that the main monitor is positioned directly in front of you because this reduces lateral neck movements.
Adjust the height of the side monitors so they’re at eye level or slightly below, because this ensures comfortable viewing and reduces straining your neck to look sideways.
All monitors should be tilted slightly inward, about 10 to 15 degrees, because an inward tilt aligns the screens with your natural line of sight and reduces neck rotation.
Key Fact:
– The ideal distance from your face to a monitor is 20-30 inches, with the top of the screen at or just below eye level.
Additional Tip: Proper monitor positioning encourages better posture and prevents long-term discomfort, making ergonomic setup an essential part of a healthy workspace.
Avoid placing monitors too far back or too close, as this can cause eye strain or poor posture.
Common Mistakes and Corrections:

Few things will trip you up faster than poor triple monitor arrangements, and I’m sure you’ve seen this in action: monitors placed at uneven heights, so someone’s neck is constantly tilting up or down.
All right, you think you’ve got the perfect setup until you’re craning your neck or staring at a corner of the screen because one monitor’s lower than the others. Now, you’re squinting just to see the text at the edge or fidgeting with monitor positions for ages.
Even a slight height difference in monitors can cause neck strain and eye discomfort.
Here’s the thing: the biggest mistake is ignoring eye level and natural line of sight. You need everything roughly on the same plane.
Obviously, that’s easier said than done when you’re dealing with different mounts, desk heights, and monitor sizes.
So, measure twice, adjust once.
Step 1: Measure your eye level when seated comfortably at your workstation, because this will serve as the reference point for aligning your monitors.
Step 2: Raise or lower each monitor so that the top of the screen is at or just below your eye level, ideally aligning within 0 to 15 degrees downward.
Step 3: Position each monitor approximately 20 to 30 inches from your face, because this distance promotes comfortable viewing and reduces eye strain.
Step 4: Arrange the monitors so that their centers are on the same horizontal plane, because uneven heights cause neck fatigue and reduce efficiency.
Step 5: For the center monitor, align it directly in front of you, at eye level, to serve as your primary display.
Step 6: Place the side monitors at about 30 degrees angles relative to your line of sight, ensuring you can glance at them without turning your head excessively.
Step 7: Ensuring proper monitor height is particularly important because the optimal monitor height for neck pain relief directly influences whether your neck stays relaxed or becomes strained.

If you’ve ever tried to clamp a monitor onto a flimsy arm only to realize the screw holes don’t quite line up or the mount can’t handle the size of your monitor, you’re not alone. I’ve been there holding a monitor in one hand, tightening the clamp with the other, only to see it slip or wobble.
Here’s the trick: check your monitor’s VESA pattern and weight before buying a mount. Because understanding these specifications ensures compatibility and stability.
All right, pick a mount rated for your monitor’s size and weight. Because selecting a mount that exceeds your monitor’s VESA pattern or weight capacity can cause failure or damage.
Next, verify your desk can handle the extra weight and depth. Determine the combined weight of your monitor and mount, and ensure the desk can support at least 50 pounds, because insufficient support may lead to instability or collapse.
Look for adjustability arguably the most important feature for comfort. Adjustability includes tilt, swivel, rotation, and height adjustments. Raise the monitor until the top of the screen is at or just below your eye level, which is approximately 20 to 30 inches from your face for optimal ergonomics. Because proper positioning reduces neck and eye strain.
And, honestly, expect the setup to take longer than those “20 minutes” manuals promise because, surprise, they never include “fighting with the screws” time. Additionally, understanding ergonomic positioning can significantly enhance your comfort and prevent strain during long work sessions.

Positioning your monitors properly isn’t just about placing them on your desk and calling it a day; it’s about actively reducing neck, eye, and back strain because those extra 15 minutes now are worth it later.
First, place the center monitor directly in front of you. Because this prevents unnecessary neck rotation and strain, position it about an arm’s length away from your face.
All right, now, angle the side screens so they’re not twisting your neck; this keeps your view natural and minimizes discomfort during extended use.
Maintaining the correct monitor distance is essential, as it reduces eye fatigue and promotes comfortable viewing over prolonged periods.
| Aspect | Recommended Position |
|---|---|
| Distance from eyes | 20-30 inches |
| Eye level | Slightly below the top of the monitor |
| Angle | 10-20 degrees inward |
Remember: Position the monitor so that the top of the screen is at or just below your eye level. Raise or lower the monitor accordingly until this is achieved because looking slightly down is less fatiguing on the cervical spine than looking straight ahead or upward.
Specific measurements:
Common mistakes and what to do instead:
– *Mistake:* Placing monitors too close (less than 20 inches) or too far (more than 30 inches), which causes eye strain or distant focus.
*Solution:* Maintain a distance of 20-30 inches from your eyes to the monitor, because this range allows for comfortable viewing without excessive eye movement.
– *Mistake:* Having the monitor too high (top above eye level) or too low (bottom below eye level), resulting in neck strain.
*Solution:* Adjust the monitor so the top edge is at or just below eye level, because this position promotes relaxed neck muscles.
– *Mistake:* Angling side monitors too sharply or leaving them flat, which causes neck twisting.
*Solution:* Tilt side screens 10-20 degrees inward so they’re aligned with your natural line of sight, because this prevents unnecessary neck rotation.
Your comfort is key adjust your monitor setup accordingly to support healthy posture and reduce fatigue during long working hours.

Getting your monitor at the perfect height and tilt isn’t just about looking professional it’s about preventing neck and eye fatigue that usually occurs around hour three of a marathon work session.
Your eyes should be level with the top of the screen, because this position reduces strain on your neck and helps maintain proper ergonomic posture. The monitor should be about an arm’s length away, specifically 20 to 30 inches from your face.
Position your eyes at or just below the top of the screen for ergonomic comfort and reduced neck strain.
To ensure optimal viewing comfort:
1. Adjust the height of your monitor so the top of the screen aligns with your eyes.
Raise or lower the monitor using adjustable stands or monitor arms until this position is achieved because it helps you look straight ahead without tilting your head up or down.
2. Tilt the monitor backward slightly, about 10–20 degrees, for comfort.
Tilt the screen to minimize neck strain and improve viewing angle because a slight backward tilt reduces the need to crane your neck.
3. Make sure no glare hits the screen, as glare messes with focus and causes eye fatigue.
Position your monitor perpendicular to windows or light sources and consider using anti-glare screens or curtains.
4. Keep the monitor centered in your line of sight for natural viewing.
Adjust your monitor position so it’s directly in front of you, preventing unnecessary head turning which can cause strain.
5. Use ergonomic stands or monitor arms to fine-tune height and tilt.
Select stands or arms that support precise adjustments, ensuring the monitor remains at your ideal height and angle.
Important measurements to remember:
Common mistakes include:
Arranging your monitors for natural viewing angles isn’t just about lining them up trust me, that’s where most people start to go wrong.
You want your main monitor directly in front of you at arm’s length, with the top at eye level, because this reduces neck strain and promotes comfortable viewing.
The side monitors should be slightly angled inward, so your gaze naturally shifts without craning your neck.
Step 1: Set your center monitor first, because positioning it correctly establishes the primary viewing position.
Step 2: Angle the side monitors inward towards your eyes, because this minimizes head movement and promotes an ergonomic viewing arc.
Step 3: Keep the inner edges of the monitors close, because creating a gentle arc helps maintain a natural viewing flow and avoids abrupt head turning.
Step 4: Adjust until you feel like you’re looking straight ahead without strain, because the neck should stay in a neutral, relaxed position during prolonged use.
Remember, the goal is to keep your head’s movement natural and comfortable.
Important measurement: The top of your monitor should be at or just below your eye level, which is typically about 45 to 55 centimeters (17.5 to 21.7 inches) from the floor, depending on your height.
Additionally, maintaining an optimal monitor distance of 20 to 30 inches from your face can significantly reduce eye strain during extended work periods.
Common mistakes:
Implement these precise adjustments to create an ergonomic and natural viewing setup, minimizing fatigue and preventing future discomfort.
Keeping your workspace tidy starts with managing those tangled messes behind your monitors, because that’s where all the chaos begins. You’ve probably fought with loose cables, pulling on wires while cursing the designer who forgot to plan cable management.
All right, first, get some cable clips or Velcro strips your best friends here. Use them to bundle cables together and prevent them from hanging everywhere.
Next, route cables along the back of your desk or monitor arms, because avoiding spaghetti piles makes cleaning easier and reduces stress.
Third, label your cables; it saves the headache if you need to switch gear later.
Fourth, consider installing a cable tray or using a concealment sleeve, because no one wants the rat’s nest effect cluttering their workspace.
*Cable management tip:*
– Cable tray or concealment sleeve should be installed within 2 inches of the desk surface to hide cables effectively and allow easy access.
Fifth, make a habit of tidying as you go, because it’s easier than scrambling to reorganize everything once cables are buried in a mess.
If you want your workspace to actually support your work instead of fighting with it, then customizing your setup for different tasks is non-negotiable.
You know those moments when you’re deep into editing, and flipping between screens feels like juggling knives? Yeah, that’s when you tweak your monitors.
For creative work, make sure your primary display is centered and at eye level no neck strain because maintaining a neutral neck position reduces fatigue and discomfort.
To achieve this, raise your monitor until the top of the screen is at or just below your eye level. A typical starting point is aligning the top of the monitor approximately 2-3 inches below your line of sight when seated comfortably.
For data-heavy tasks, dedicate one screen to spreadsheets and another for references.
Freelancers managing multiple projects might want one monitor for communication purposes, such as email or messaging apps, to keep conversations organized.
Remember, the setup should change with your workload. Don’t get stuck with a one-size-fits-all arrangement.
Your ergonomics should prioritize comfort, so avoid bending, stretching, or craning your neck just to access your work.
Key measurements and tips:
Common mistakes to avoid:
Ever tried setting up a monitor and thought, “Why does this feel like I need a degree in engineering?” Well, that’s where the must-have accessories come in to save your sanity, and your neck.
You’ll want:
Important measurements:
All right, these accessories simplify your setup and help you avoid that awkward “my neck is killing me” moment.
Common mistakes to avoid:
Trust me, a little investment here pays off every time you sit down to work leading to a smooth, comfortable, and sane workspace.
When setting up your multi-monitor workspace, the biggest mistake you can make is ignoring how your monitors relate to your body and your desk. Trust me, I’ve been there struggling with adjustable arms, forgetting eye level, and ending up with neck pain.
Here’s the thing: your monitors should form a comfortable curve around you because this reduces neck and eye strain.
| Mistake | Why It’s Bad | Fix |
|---|---|---|
| Monitors too low | Strains neck because you have to look down continuously | Raise the monitor until the top of the screen is at or just below your eye level, because looking slightly down reduces cervical strain. |
| Monitors too far apart | Overstretches your neck and shoulders because you have to turn your head extensively | Keep monitors within arm’s reach, typically 20 to 30 inches from your face, to minimize head movement. |
| Inconsistent heights | Causes discomfort and awkward posture because monitors are at different levels | Align all top edges of monitors to create a uniform, ergonomic surface. |
| Ignoring glare | Causes eye strain because reflections and bright lights cause discomfort | Adjust lighting to eliminate glare or tilt monitors to reduce reflections. |
Important measurements and guidelines:
All right, avoid these mistakes, and your setup will be significantly more comfortable and less of a headache.
A monitor stand or arm won’t stay perfect forever, and your ergonomic setup is no exception. Over time, your monitors may shift, screws can loosen, and your posture might slip out of alignment. To keep everything properly positioned, check your setup weekly.
Monitor setups require weekly checks to maintain optimal ergonomics and prevent shifting or misalignment.
Highlighted facts:
Common mistakes and solutions:
– Mistake: Ignoring hardware looseness, leading to unstable setups.
Solution: Regularly tighten all fasteners to prevent monitor drift and maintain alignment.
– Mistake: Crooked monitors causing neck or eye strain.
Solution: Use a level to ensure monitor arms are horizontal and adjust accordingly.
– Mistake: Chair height that causes your hips to be below or too high relative to knees.
Solution: Adjust the chair so your hips are slightly higher or equal to your knees, with feet flat on the ground.
– Mistake: Neglecting to adjust monitor position as needs change.
Solution: Reassess monitor angle and distance every few months to maintain optimal ergonomics.
So, you’re probably wondering if your triple monitor setup is really ergonomic or just a fancy way to make life harder. Honestly, it’s a common question. The key is proper positioning.
First, make sure your middle monitor is directly in front of you because this is your primary screen. The side monitors should be angled inward at about 30 degrees because this reduces neck and eye strain by minimizing head movement. Keep the top of each screen at or slightly below eye level to prevent neck fatigue.
Here is a quick summary:
| Question | Answer | Tip |
|---|---|---|
| Do I need a special stand? | Not necessarily, but adjustable arms help a lot. | Use arms to fine-tune height and angle. |
| Should screens be aligned horizontally? | Yes, to prevent neck strain. | Keep eyes level and minimize head movement. |
| How close should I sit? | About an arm’s length or slightly less. | Position the monitor approximately 20-30 inches from your face, because this distance offers optimal visibility and comfort. |
Additional guidance:
Common mistakes to avoid:
Test your setup regularly and adjust accordingly proper ergonomics promotes comfort, reduces fatigue, and enhances productivity.
You reduce eye strain by keeping monitors at eye level, about an arm’s length away, and slightly below your line of sight.
Adjust the brightness and contrast to match your ambient lighting, so your eyes aren’t working overtime.
Take regular breaks 20-20-20 rule works well. And look away periodically to reset your focus.
Honestly, once you get your monitors aligned right, your eyes will thank you quicker than you think.
You want monitors around 27 inches with a resolution of 1440p or 4K, depending on your graphic card.
Larger screens are better for immersion but can strain your neck if you can’t adjust height.
All right, aim for a consistent size, so switching focus feels natural.
You should take a break every 20-30 minutes, just like clockwork.
Think of it as giving your eyes a timeout from map-reading a neon billboard.
Stand up, stretch your legs, maybe close your eyes for a moment.
Setting a timer is your buddy here trust me, I’ve ignored it and regretted the tired eyes and neck ache later.
Keep it simple, keep it regular.
Your body will thank you.
Yes, curved monitors can improve ergonomics in a triple setup. They bring the screens closer to your natural field of view, reducing head and eye movement, which is a relief after hours staring at flat screens.
All right, remember, not all curves are equal; pick a gentle curve, especially for the center monitor. It’s all about minimizing neck strain and creating a seamless viewing experience trust me, your back will thank you.
First, grab a calibration tool or download a reputable calibration app don’t just eyeball it, you’ll regret that. Set your monitors to their default settings.
Then, follow the prompts to adjust brightness, contrast, and color temperature be precise, not perfect. Compare colors with a known reference.
Keep your calibration consistent across screens not easy, but worth the hassle. Remember, calibration isn’t a one-and-done revisit it when ambient light changes.
Alright, so here’s the truth setting up your triple monitor isn’t rocket science, but it does require some tweaks. Trust me, I’ve been there, battling with clamps that refuse to tighten and screens that stare back at odd angles. The key? Balance, height, and a little patience. Chances are, once you get it right, you’ll wonder why you didn’t do this sooner. Just remember, your setup should work for *you* not the other way around.


