Physical Address
304 North Cardinal St.
Dorchester Center, MA 02124
Physical Address
304 North Cardinal St.
Dorchester Center, MA 02124

If your lower back is talking to you by 3pm, you already know this is a problem worth solving. To keep those pesky aches at bay, your chair needs to support your natural curve.
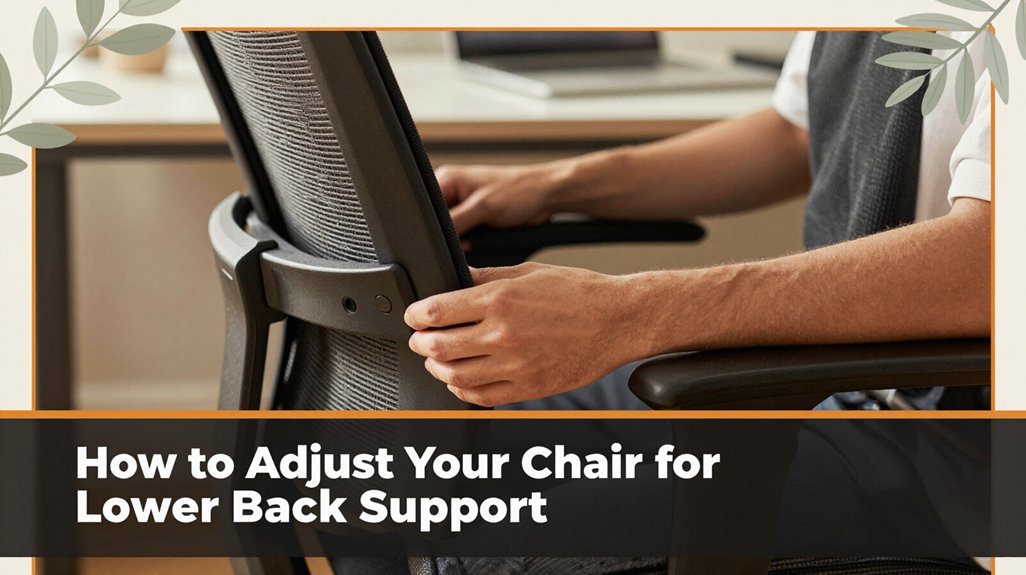
Adjust the lumbar support so it fits just below your ribs roughly where your lower back naturally arches inward and sit back so it fills the hollow. Make sure your knees are 2 to 4 inches from the seat edge, and keep everything comfy. Stick with me, and you’ll learn how simple tweaks can help you stay pain-free all day.
This article contains affiliate links. If you purchase through them, I may earn a small commission at no extra cost to you. I only recommend products I genuinely believe in.
You’ve probably felt it: You’re sitting at your desk, knees at a right angle, back straight-ish, and yet, somehow, your lower back begins to protest. That’s where chair adjustment for lower back support becomes important, because when your chair isn’t supporting that natural curve, your lower back has to do all the work it gets sore, stiff, and maybe even a little angry.
Proper lower back support keeps you aligned, so your spine isn’t fighting gravity all day. It’s not about sitting perfectly it’s about feeling good enough not to wish you could disappear into your keyboard. Adjusting your chair’s lumbar support isn’t complicated, but it’s essential.
Proper lumbar support keeps your spine aligned and helps you feel comfortable all day.
Because if your lower back feels happy, you’ll be happier too and your workday might just become a little less miserable.
Step 1: Adjust the chair’s lumbar support so it fits the natural inward curve of your lower back, because proper support maintains spinal alignment and reduces strain on the lumbar discs.
Step 2: Position the lumbar support so it contacts your lower back at the level of the bottom of your rib cage, approximately between the first and third lumbar vertebrae, because this area provides the most effective support for the lumbar curve.
Step 3: Sit back fully into the chair, ensuring the support fills the hollow of your back, because this prevents slouching and promotes proper posture.
Step 4: Confirm that your lower back is supported comfortably without pressing too tightly against the lumbar cushion, because excessive pressure can cause discomfort and negate the support benefits.
Key Measurement: The distance between the back of your knees and the front of your seat should be between 2 to 4 inches (5 to 10 cm), because this ensures your thighs are supported without restricting circulation.
Common Mistake: Sitting with the lumbar support set too high, pushing against your mid-back instead of the lumbar region, because this misalignment can cause shoulder hunching and neck strain. To avoid this, adjust the lumbar support downward until it aligns with the curve of your lower back.
Common Mistake: Relying solely on the chair’s built-in lumbar support without verifying fit, because incorrectly positioned support can lead to discomfort. Always verify the support contacts the natural curve of your lower back rather than just feeling pressure elsewhere.
Additional Tip: Choosing an ergonomic chair with adjustable support features can significantly improve comfort during long sitting sessions, emphasizing the importance of customizable support.
Sometimes, despite your best efforts, your back signals that your support isn’t quite doing its job. You might notice your lower back aching after an hour, or perhaps you feel a tightness creeping up your spine, making you shift in your chair again. It’s like your back is trying to tell you, “Hey, I need more help here.”
When you stand up and find yourself waiting a second before moving, that’s a clue something’s off. All right, maybe your support isn’t enough if you feel soreness, strain, or a lingering stiffness that just won’t go away.
Your body isn’t lying it’s giving you signs that your support needs some fine-tuning. Ignoring these signals won’t make the discomfort disappear.
Choosing the best office chair for your back isn’t just about picking the most visually appealing or highly adjustable model it’s about finding a seat that genuinely supports your unique body shape and needs. You want a chair that fits YOU, not the other way around. Whether you’re a little curvier or have a wider back, here’s a detailed guide:
| Feature | What to Look For | Why It Matters |
|---|---|---|
| Lumbar Support | Adjustable, contoured support | Keeps your lower back in a healthy, natural curve; prevents slouching and lower back pain. |
| Seat Depth | Enough space for your thighs, approximately 2 to 4 inches of clearance between the seat edge and behind your knees | Prevents pressure on the back of your knees and promotes proper circulation. |
| Adjustability | Height, tilt, and armrests adjustable | Allows a custom fit for your body, because a proper ergonomic fit reduces strain and increases comfort. |
Additional Recommendations:
Important Measurements and Formulas:
Trust me, once you find the right fit, sitting won’t feel like a minor rebellion against your anatomy. Proper ergonomic setup supports your back and overall health during long work hours.
All right, let’s talk about setting that chair height just right because if your seat is too high or too low, even the comfiest lumbar support won’t do its job. You want your feet flat on the ground, toes relaxed, and knees roughly at a 90-degree angle.
Knee Angle: Keep your knees at approximately 90 degrees because this position minimizes pressure on your lower back and promotes proper blood circulation.
Hip Position: Adjust the chair height so your hips are level with or slightly above your knees because this alignment supports the natural curvature of your lumbar spine.
If your chair’s too high, your hips might slump forward; too low, and your pelvis tilts, stressing your lumbar curve.
Seat Height Adjustment: Lower the seat so your hips are slightly higher than your knees about 2 to 4 inches because this promotes natural lumbar lordosis and maintains proper spinal alignment.
Feet Placement: Ensure your feet are flat on the ground with toes relaxed because this stabilizes your lower body and reduces strain.
Monitor the Seat Height: Set the chair height so that your thighs are parallel to the floor because this distributes weight evenly and prevents pressure points.
Final Tip: Test your position by sitting upright, ensuring your back is supported, and adjust until you feel balanced and comfortable because proper chair height supports your posture, lumbar support and reduces fatigue and discomfort during prolonged sitting.

Your lower back has a natural curve called the lumbar curve that provides essential support for proper posture and spinal health. Now, if your chair doesn’t support that curve, it’s like trying to sit on a flat pancake instead of a comfortable hammock.
Find the adjustable lumbar support, which is probably a small roller or a pad with a knob or lever to control its position.
Helpful fact: Position the lumbar support to align with the natural curve of your lower back, usually around the level of your waist, which is approximately at the height of your iliac crest.
Common mistake: Sitting without lumbar support or with support placed too high or too low causes unnecessary strain and discomfort. To avoid this, adjust the support to fill the hollow area, ensuring consistent contact along the curve of your lumbar spine.
Additionally, ensuring the lumbar support encourages a neutral spinal alignment can significantly reduce discomfort during long hours of sitting.
One of the simplest but most overlooked secrets to comfy sitting is making sure your feet are flat on the floor. Seriously, it’s such a small move but can totally change your comfort.
When your feet dangle or pinch with your chair’s height, your hips get out of sync, and that throws off your lower back.
All right, you might think, “I can just scoot back and relax.” But if your feet aren’t grounded, your lower back ends up doing all the heavy lifting and not in a good way.
Place your feet flat on the floor****, because this stabilizes your hips and supports your lumbar region.
Adjust your chair height** until your knees are bent at about a 90-degree angle**.
*Highlight:* When seated properly, your knees should be approximately 90 degrees, which helps keep your pelvis in a neutral position and reduces strain on your lower back.
Ensure your feet are firmly planted on a stable surface, like a footrest if your chair height can’t be adjusted enough to achieve this.
Sit back in your chair so that your lower back is supported by the lumbar support of the chair, preventing slouching.
These minor adjustments are tiny tweaks that keep your spine happy and prevent that sluggish, stiff feeling later. Incorporating proper workspace ergonomics is essential for long-term spinal health.
Now, let’s talk about how to set that backrest so it’s actually doing its job. You want your backrest to support your lower spine’s natural curve because proper support prevents slouching and over-arching.
Lean back and feel where the curve hits your lumbar area. Adjust the angle so it’s slightly reclined, not locked straight up or overly reclined. A good range is around 100-110 degrees because this position offers a balanced combination of support and relaxation.
Key Measurement:
– The backrest should be set at an angle of 100-110 degrees to provide a comfortable yet supportive posture.
Think of it like a cozy yet supportive hug for your back.
It might feel a little weird at first, but trust me, once it’s in the right spot, you’ll notice you’re less tired and more comfortable.
To maximize lumbar support, consider an external lumbar cushion if your chair’s built-in support isn’t adjustable enough.
Sometimes, even after you’ve dialed in the perfect backrest angle, your lower back still manages to feel like it’s falling through the cracks. That’s when adding lumbar cushions or supports can save the day.
Here’s what to do:
All right, this isn’t rocket science. It’s about filling the gap that your posture mightn’t naturally support.
Think of it like adding a tiny, friendly cushion that’s there to remind your spine, “Hey, I’ve got your back.”
The first thing you want to do is make sure your monitor and desk are at the right height because if they’re not, your back will remind you pretty quickly usually in a way that’s hard to ignore.
Sit back and look straight at your screen because your eyes should be level or just slightly downward. If you’re craning or straining your neck, adjust the height of your monitor.
Lower the monitor until the top of the screen is at or just below your eye level, because looking slightly down reduces strain on the cervical spine. Your eyes should be aligned with the top third of the screen for optimal viewing comfort.
Your elbows should be close to a 90-degree angle and parallel to the floor.
If your elbows are higher or lower than this, raise or lower your desk accordingly, or use an adjustable keyboard tray because this helps maintain neutral wrist positioning and reduces shoulder strain.
Important measurement: Keep your elbows at 90 degrees while your hands rest comfortably on the keyboard.
When your monitor is too low or too high, it throws your whole posture off, which can lead to persistent lower back pain you really don’t want to deal with all day.
Common mistake to avoid: Tilting your head forward to see the screen clearly, which causes neck strain and poor back posture. Instead, position the monitor properly to keep your head aligned over your shoulders.
If you want to keep your lower back happy all day long, staying mindful of your posture is key, because those little habits add up fast. Here are some tips to help you maintain that support:
Key Measurement Fact:
– Sit with your hips and knees at approximately 90 degrees this aligns your pelvis and supports lower back health.
All right, let’s discuss some common mistakes that often occur when adjusting your ergonomic chair issues that might seem minor but can significantly undermine your comfort and posture.
First, do not set your chair height without considering lumbar support because a proper lumbar curve reduces lower back strain. Raise or lower your chair so that your feet are flat on the ground, with your knees at a 90-degree angle, but ensure the lumbar support aligns with your lower back’s natural inward curve.
Second, avoid tilting the backrest too far forward or backward because improper tilt angles cause pelvis slumping or excessive arching, leading to discomfort. Find a backrest angle between 90 and 110 degrees that maintains your natural pelvic alignment and relieves spinal pressure.
Third, do not ignore the armrest position. Armrests should support your shoulders without pushing them upward or downward because improper armrest height causes shoulder tension and neck strain. Adjust armrests so that your elbows are at approximately 90 degrees when your hands rest comfortably on them, with upper arms close to your torso.
Finally, do not neglect to periodically reassess your setup because comfort levels shift as you move or after extended use. Reevaluate your seat height, backrest angle, and armrest positions every two weeks, or whenever you notice discomfort, to ensure ongoing ergonomic support.
Key measurement:
– Monitor height: adjust so that your feet are flat, knees at 90 degrees, and you maintain a relaxed, upright posture.
Summary table:
| Mistake | Why it Matters | How to Fix |
|---|---|---|
| Setting height without lumbar support | Causes lower back strain because the lumbar curve is unsupported | Adjust lumbar support first to match your lower back’s natural inward curve |
| Over-tilting backrest | Leads to pelvis slipping, slouching, and discomfort | Find a backrest angle between 90-110 degrees that supports your pelvis |
| Ignoring armrest position | Causes shoulder and neck tension because arms are unsupported or misaligned | Set armrests so elbows are at 90 degrees and arms are close to your torso |
| Forgetting to reassess | Comfort shifts over time and with movement | Reevaluate and adjust your chair every two weeks or when feeling discomfort |
Ever notice how that nagging ache in your lower back seems to come and go, but sometimes sticks around longer than you’d like? It’s your body’s way of saying, “Hey, maybe I need some expert advice.”
So, when should you see a professional? Here are three signs:
1. Persistent pain If your lower back bothers you for more than a few weeks, it’s not just a muscle strain, because ongoing discomfort can indicate a deeper issue.
2. Radiating symptoms Numbness, tingling, or weakness spreading down your legs, because these signs suggest nerve involvement.
Action: Seek medical attention immediately if you experience these symptoms, because delayed treatment can lead to permanent nerve damage.
3. Injury from trauma If you took a fall or got hit, and pain lingers or worsens, don’t downplay it.
Action: Visit a healthcare professional promptly, because untreated injuries can develop into chronic problems or complications.
Important fact:
*Measure your elbow height to determine the proper monitor position: raise the monitor so that the top of the screen is at or just below your eye level, which is typically around 48 to 50 inches from the floor for an average adult.*
All right, your back isn’t worth risking bigger problems. Trust your gut see a professional if anything feels off, because early evaluation can prevent long-term issues.
You should readjust your chair whenever you notice your lower back isn’t feeling supported anymore, typically every few hours or when your posture shifts.
Think of it like checking in with a friend you want to make sure your back’s cozy before it starts complaining.
Sometimes, your body subtly slouches or shifts, so stay tuned.
All right, keep an eye on your comfort it’s the secret to making sitting less of a chore.
Yes, incorrect armrest height can affect your lower back support.
When your armrests are too high or low, you tend to hunch or lean awkwardly, throwing off your spine’s alignment. It’s like trying to sit in a chair that’s not quite right you end up compensating with your back.
You want your gaming chair to cradle your lower back without squeezing or leaving you hanging. Adjust the lumbar support so it fits your natural curve think of it like giving your spine a warm hug.
Set your seat height so your feet rest flat and knees are at a right angle. Tighten armrests to keep your shoulders relaxed, and lean back to test if everything feels balanced.
It’s all about feeling supported without fuss.
You’ll know your lumbar support is right when it feels like your lower back gets a gentle hug, not a squeeze.
Sit back, and if your support lines up with the natural curve of your spine, you’re golden.
If it’s too high or low, it’s like trying to fit a square peg in a round hole uncomfortable and pointless.
Adjust until it feels supportive but free, like a good friend giving just the right amount of advice.
Yes, sitting on a balance ball can help your lower back, but it’s not a miracle fix. You’ll engage core muscles more, which supports your spine naturally.
Still, it’s tricky your back needs steady support, not constant balancing. If you switch between your desk chair and the ball, it can strengthen your muscles over time.
Just don’t forget to listen to your body and avoid overstretching beyond comfort.
Alright, you’ve practically cracked the code on keeping your back blissfully supported, and that’s no small feat. Just remember, staying mindful, making minor adjustments, and avoiding those ergonomic errors can turn your desk-bound drudgery into a more comfortable, confident climb through your day. You’ve got this stay steady, support your spine, and don’t forget to listen to what your back is telling you. After all, a happy back makes for a happier, healthier you!


