Physical Address
304 North Cardinal St.
Dorchester Center, MA 02124
Physical Address
304 North Cardinal St.
Dorchester Center, MA 02124

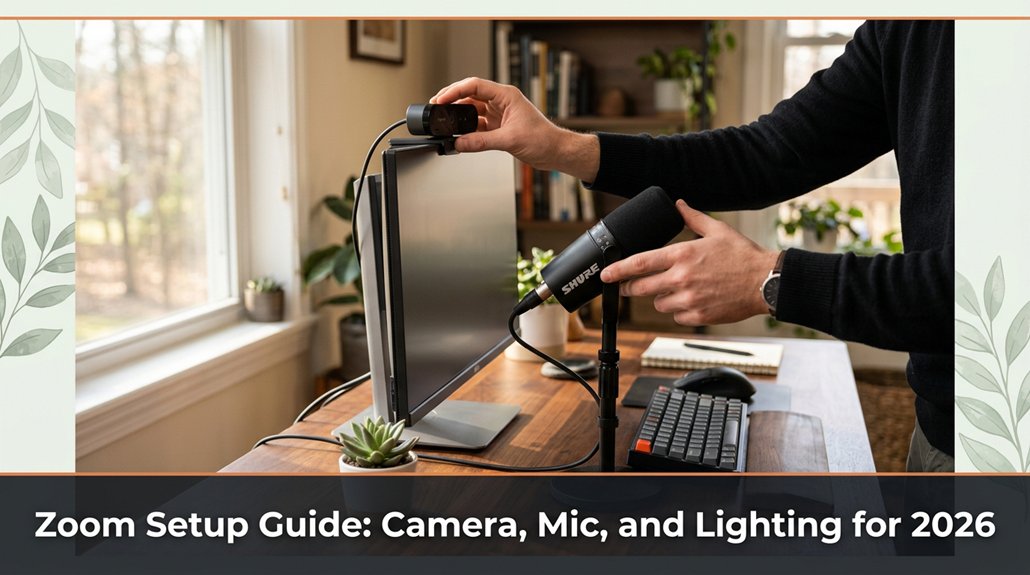
Struggling to get your Zoom calls to look professional without turning into a tech headache? You’re in the right place. The key is setting up your camera, mic, and lighting so you look confident and natural.
Pick a decent camera USB webcams work fine and position it at eye level, about 20-30 inches from your face, so you appear engaged. Use a good microphone something like a Blue Yeti and keep it 6-12 inches from your mouth to ensure clear audio.
Light your face evenly with soft, warm bulbs, and avoid backlighting that can create shadows or silhouettes. Keep your background tidy, and always test your setup before joining that important meeting. Stick with me, and I’ll reveal pro hacks to make your Zoom setup effortless and polished.
This article contains affiliate links. If you purchase through them, I may earn a small commission at no extra cost to you. I only recommend products I genuinely believe in.
Ever wonder why some Zoom calls look like Hollywood productions, and others look like you’re underwater? Well, when it comes to your home office setup for Zoom, choosing the right camera is key. You don’t want to be that person with a blurry face or grainy background trust me.
First, pick a camera that offers crisp, clean video in your usual lighting conditions. Because USB webcams typically provide sufficient quality for most home setups, they’re generally recommended; there’s no need to overcomplicate things with high-end professional equipment unless you want to.
Now, don’t forget placement: your camera should be positioned at eye level. Because looking slightly up or down can be distracting or unflattering, position your camera so that it’s aligned with your eyes.
Important fact: Position the camera so that your eyes are roughly one-third from the top of the frame this creates a balanced and engaging composition.
Here’s the thing: spend a little time adjusting camera settings, such as exposure, white balance, and focus, to optimize video quality. Because automatic settings can sometimes cause flickering or poor color, manual adjustment ensures a consistent, professional appearance.
And avoid the temptation to use your phone’s front camera unless you’re prepared for shaky zooms. Phone cameras often produce unstable footage if the device isn’t mounted on a tripod or stable surface.
Additionally, consider lighting: use soft, diffused light sources in front of you, about 2-3 feet away, to evenly illuminate your face. This prevents harsh shadows and makes you appear clearer on camera.
Vague step replaced with specific measurement: Position yourself approximately 20 to 30 inches (about 50 to 75 cm) from your camera to achieve a natural, professional framing your face should fill the frame without cutting off the top of your head or showing too much empty space.
Additional tip: Use proper lighting placement by avoiding direct glare or reflections, which can cause glare or glare-related shadows, ensuring a more flattering and professional appearance.
Common mistakes and solutions:
– Mistake: Sitting too close or too far from the camera, causing distortion or unflattering framing.
Solution: Adjust your seating so your face takes up about 60-70% of the frame, maintaining the 20-30 inch (50-75 cm) distance.
– Mistake: Using the device’s default front camera without adjustments, leading to shaky or poorly lit footage.
Solution: Use a dedicated webcam or mount your phone on a stable tripod, and set manual focus and exposure for clear video.
Simple, smart choices like precise placement, proper lighting, and setting adjustments make a huge difference in your Zoom video quality.

When it comes to clear Zoom audio, choosing the right microphone can feel like maneuvering through a legal jungle, full of jargon and opinions. Here’s what I recommend:
Important note: All these options will improve your sound quality if configured properly, so choose based on your setup and budget.
Additional Tips:
Did you know?
Measurement tip: Position the microphone 6 to 12 inches from your mouth, which balances clarity with natural sound capture.

Lighting your room for a professional Zoom look isn’t just about flicking on a lamp and hoping for the best, because proper lighting enhances your image quality and presents a polished appearance.
All right, the key is even, soft lighting. You don’t want harsh shadows or spots that turn your face into a spotlight because uneven lighting can be distracting and unprofessional. Use a combination of natural light and soft, adjustable lights think ring lights or desk lamps with dimmers because this allows you to control the brightness and avoid overexposure.
Position your light source slightly above and in front of you, about 45 degrees because lighting from this angle minimizes shadows and creates a flattering, natural look. Specifically, set the light so that the top of the source is at or just above eye level.
Avoid placing your light behind you or too low because backlighting or below-eye-level light causes unflattering shadows and makes you fade into the background.
Look for a balanced glow that evenly highlights your face without creating harsh shadows or overly bright spots. Adjust the brightness until your face is well-lit and appears natural to the camera.
Be cautious of fluorescent bulbs that flicker or cast a greenish or blue tint because they can distort your appearance. Instead, choose warm white or soft white LED bulbs with a color temperature between 2700K and 3000K for a natural skin tone.
Remember this formula for optimal face lighting:
Place your main light source approximately 45 degrees in front and above your face, with the light height at or just above eye level, and keep the light soft and adjustable.
This setup ensures your face is evenly lit, reduces shadows, and gives you a professional, approachable appearance on Zoom.

Once you’ve got your lighting dialed in, it’s time to turn your attention to your background, because that’s the part everyone sees behind you, and trust me, it matters more than most people think. You want a clean, distraction-free space that puts you front and center.
Here’s the trick:
Here’s the trick: keep your background simple, tidy, and personalized to stay professional and focused.
Additional Tips for a Professional Look:
Important Measurements and Standards:
Remember: No background is perfect, but following these tips will help you look professional without turning your home into a showroom.

Your camera and microphone placement can make or break your Zoom call impacting how confident you appear and how clear your voice is.
Think of your camera like your best friend’s eyes. Position it at eye level because this angle promotes more natural and engaging communication.
If the camera is too high, you’ll be looking down, which can seem intimidating or unapproachable. If it’s too low, you appear to be looking up at the camera, giving an impression of dominance or arrogance.
Microphone placement is equally crucial. Keep your microphone close enough so your voice sounds vibrant and clear, typically within 6 to 12 inches (15-30 cm) from your mouth. Because too distant, your voice becomes faint and muffled; too close, and you risk capturing breathing or popping sounds.
To avoid echoes and muffled sound, test your microphone placement beforehand and adjust as needed for optimal clarity.
Effective Camera and Microphone Setup Tips:
| Feeling confident | Looking overwhelmed | Voice clear but distant | Noisy background |
|---|---|---|---|
| Perfect framing where your eyes are focused. | Camera angle too low or too high. | Microphone placed too far from your mouth. | Background clutter or noise. |
| Calm and professional presence. | Exhibiting anxious or distracted gestures. | Clear sound with proper microphone positioning. | Environmental distractions interfering with audio. |
Camera Placement Advice:
Microphone Placement Advice:
Common Mistakes and How to Avoid Them:
A good webcam isn’t enough, trust me. I’ve been there, holding a camera in one hand while trying to tighten a nut with the other, only to realize I should’ve brought the right attachment. All right, let’s talk accessories that actually make your Zoom look professional.
Important Measurement:
– Keep your monitor 20 to 30 inches from your face because this distance minimizes eye strain and provides a comfortable viewing angle. Position the top of your monitor at or just below eye level, approximately 0 to 15 degrees downward tilt, for ergonomic comfort.
Common Mistakes and Fixes:
Additionally, paying attention to monitor brightness and color temperature can help reduce eye strain during long meetings.
Building a professional Zoom setup involves precise placement of accessories and attention to ergonomic guidelines.
This ensures clear communication, polished appearance, and a clutter-free environment conducive to productive virtual meetings.
Troubleshooting camera, microphone, and lighting problems in Zoom can feel like trying to fix a spaceship with a butter knife, because it’s often more straightforward than it seems.
First, check your device permissions because Zoom may be blocked from accessing your camera or mic without you realizing it. Open your system settings and ensure Zoom has full access to your camera and microphone.
Ensure Zoom has permission to access your camera and microphone in your device settings for smooth performance.
Next, verify that your hardware isn’t muted or turned off. This might seem obvious, but many people forget to unmute themselves or turn on their camera during calls.
If your video appears grainy or dark, adjust your lighting. Use simple desk lamps positioned to illuminate your face from the front, ideally at eye level, because good positioning prevents shadows and improves image clarity.
Lighting adjustment tip: Position your light source approximately 20 to 30 inches from your face, aimed directly at your face for optimal illumination.
If your audio cuts out or sounds muffled, test your microphone in another application (such as Voice Memos on Mac or Voice Recorder on Windows) first, because it helps identify whether the problem lies with Zoom or the hardware itself.
Microphone troubleshooting step: Ensure your microphone isn’t muted within Zoom settings or on your device.
Troubleshooting is mostly about patience and checking connections. Think of it like debugging a car: systematic testing and elimination achieve better results than rushing or guesswork.
If you want your long Zoom calls to feel less like a shaky documentary and more like you’re actually in the same room, it all comes down to your setup.
Trust me, I’ve been there 45 minutes in, wrangling cables, and realizing the manual skipped step 4 for a reason.
Here’s the thing:
Lighting Tip: Position your light source so it illuminates your face evenly, ideally facing you or at a slight angle, and avoid strong backlighting to prevent silhouettes.
Audio Tip: Use a high-quality microphone such as the Blue Yeti or the Rode Lavalier GO, positioned approximately 6 to 12 inches from your mouth for optimal pickup, because this range captures your voice clearly without picking up excessive background noise.
Internet Tip: Ensure your wired connection has a speed of at least 25 Mbps download and 3 Mbps upload, because lower speeds cause lag and disconnections during calls.
Ergonomic Tip: Consider using an adjustable drafting chair to maintain proper posture and minimize discomfort during long sessions, especially if your workspace is primarily designed for sitting ergonomics is key to sustaining focus and avoiding strain.
All right, now you’re set to stay sharp.
If your Zoom looks choppy on a slow connection, lower your video quality first.
Go into Zoom settings, find “Video,” and switch the resolution to Standard HD or lower. Disable HD video altogether if needed trust me, nobody notices.
Also, close other apps hogging bandwidth.
All right, your priority is to send less data, so Zoom won’t stutter. It’s simple, but you’ll thank me when you’re not stuck troubleshooting.
Sure, managing multiple devices during calls is like juggling flaming torches you gotta stay focused.
You, the master, should silence notifications, disconnect unused devices, and set your main device as the only audio source.
All right, keep close tabs on bandwidth syncing multiple streams tanks your quality.
And remember, unplugging a second mic or monitor that isn’t essential can save you from weird echo chaos.
It’s all about streamlining your setup, not turning it into a circus.
You should cover privacy spots with tape, shut off your mic when not speaking, and double-check camera angles before calls.
All right, avoid sharing your entire screen or letting colleagues see your messy room you’re not on a video tour.
Now, keep software permissions tight only grant camera and mic access to trusted apps.
And, honestly, if you’re paranoid, setting a virtual background is your friend that way, no surprise laundry sneaks into frame.
You just gotta connect your third-party accessories like microphones or cameras to your computer first.
For USB devices, plug and play done. For older gear, you might need drivers or specific software.
In Zoom, go to Settings, then Audio or Video, and select your device. Sometimes, it’s a matter of restarting Zoom after plugging in new hardware, or juggling a few device priority settings.
Easy once you get past the initial conundrum.
You absolutely can automate lighting adjustments during a Zoom meeting.
Most smart lighting systems support scheduling, scene presets, or even integrations with smart home hubs like Alexa or Google Home.
All right, you set up your preferred lighting scenes beforehand, then use IFTTT or app integrations to trigger changes when the meeting starts or certain conditions occur.
Trust me, it’s a game changer no more fumbling with switches mid-call, just smooth lighting shifts.
So there you have it your quick guide to making your Zoom calls look and sound way better. And here’s a stat to keep in mind: 85% of people say that good lighting makes a meeting seem more professional. I know, sounds obvious, but the difference is huge. You don’t need full Hollywood gear just enough to look sharp and sound clear. Trust me, once you nail this setup, you’ll never go back to those fuzzy, echo chambers.