Physical Address
304 North Cardinal St.
Dorchester Center, MA 02124
Physical Address
304 North Cardinal St.
Dorchester Center, MA 02124

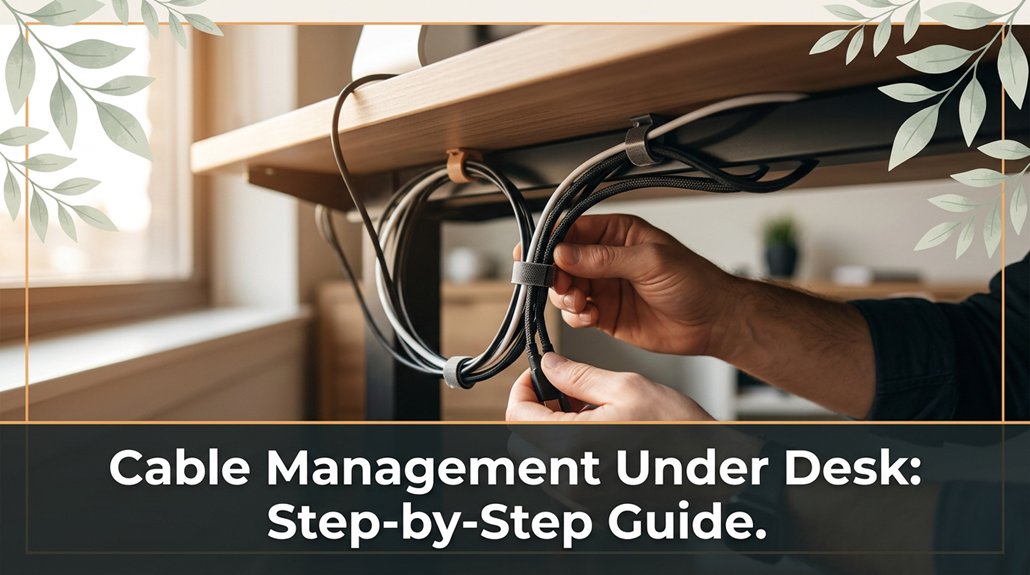
Dealing with under-desk cables can quickly turn into a tangled nightmare if you’re not careful. To keep your workspace neat and prevent frustration, start by mapping out your devices and measuring cable lengths, adding about 20% for routing flexibility.
Use zip ties, clips, or Velcro straps to bundle and route cables along the desk edges, staying clear of tight corners that could cause fraying. Keep things simple, and make a habit of checking for wear or tangles regularly. Stick with these steps, and you’ll soon master a tidy, frustration-free setup.
This article contains affiliate links. If you purchase through them, I may earn a small commission at no extra cost to you. I only recommend products I genuinely believe in.
If you’ve ever tried to juggle multiple cables behind your desk and felt like you’re in a never-ending spaghetti nightmare, you’re not alone. That’s where under-desk cable management comes in. Properly tidying your cables isn’t just about aesthetics it actually saves you time and reduces frustration.
When your cables hang loose, you create trip hazards, because cables may be pulled accidentally or cause you to stumble when moving around the workspace. Additionally, yanking on loose cables can disconnect or damage equipment, like pulling a power strip loose or dislodging a device. Trust me, I’ve been there.
Good under-desk cable management prevents this chaos by keeping cables organized and secured. It maintains a neat workspace and makes adding or removing devices quick and easy. Furthermore, it prevents cables from turning into a tangled mess when troubleshooting is needed.
Think of it as giving your desk a breathing room, allowing for smoother operation and maintenance. Ultimately, well-organized cables enhance both safety and productivity, and you’ll thank yourself later.
Key Fact:
Keep cables at a maximum of 3 feet (91 centimeters) in length behind your desk to prevent excessive slack and tangling.
Planning your under-desk cable setup might sound boring, but it’s really just about laying the groundwork so things don’t turn into a tangled disaster later on. I’m sure you’ve been 45 minutes into assembling something when you realize step 4 assumed something step 2 never told you.
First, map out your devices monitor, mouse, keyboard, chargers because knowing what equipment you need to connect helps prevent overlooked cables later. Think about where cables will run front, back, sides and avoid crossing paths unnecessarily, which can cause snags and disconnections.
Outline your devices and cable paths to prevent snags and disconnections later.
Measure the length of each cable you’ll need don’t guess to ensure you have sufficient slack for movement and adjustments.
Key Measurement: When measuring cable lengths, add an extra 20% of the distance to account for routing around furniture and user movement.
Next, consider your workspace layout: where will your power outlets be? Can you route cables neatly along the edges of your desk or underneath using cable channels or spiral wraps?
All right, don’t forget to leave some slack for movement and future adjustments, because tight cables can cause strain and damage over time.
Common Mistake: Avoid routing cables directly across tight corners or under heavy furniture, which can lead to abrasion or accidental disconnection. Instead, route cables along smooth, unobstructed paths secured with cable clips or adhesive mounts.
Additionally, incorporating cable sleeves can help group multiple cables together, keeping your setup more organized and protected. Planning pays off your future self will thank you when cleanup is simple and your desk isn’t a cable jungle.
Sometimes, finding the right tools for cable management feels like trying to assemble furniture without the instructions, because it can be confusing and prone to missteps.
First, grab zip ties, because they’re simple, inexpensive, and hold cords tightly.
Next, pick up some cable clips or clamps, because these keep cords organized and prevent tangles.
Then, consider adhesive-backed mounts if you prefer not to drill holes in your desk, because they provide a secure attachment without causing damage.
Now, evaluate your setup’s complexity to choose the appropriate tools.
For a minimalist desk, use a few cable clips and zip ties, because fewer tools are easier to manage in simple configurations.
If you have multiple cables, invest in more substantial accessories such as cable sleeves or spiral wraps, because they effectively bundle many cords into one neat package.
Specific measurement tip:
– When bundling cables, maintain a diameter of no more than 1.5 inches for optimal flexibility and airflow.
The trick? Select tools based on how complex your setup is.
If you have a lot of cords, opt for larger cable management accessories to handle the volume comfortably.
Properly managed cables can be installed quickly, and your desk will thank you for it by staying tidy and functional.

Organizing and routing your cables neatly, because it not only enhances your desk’s appearance but also helps prevent accidents and facilitates easier future adjustments. Using cable sleeves or management solutions can further streamline your setup and protect your cords from damage.
First, group similar cables together, like all your monitor cords or power strips. Use zip ties or cable clips to bundle them because this reduces clutter and prevents tangled wires, which can become trip hazards.
Map out a route that keeps cables along the back or sides of your desk, away from foot traffic because this minimizes obstruction and accidental disconnection.
| Step | Tip | Purpose |
|---|---|---|
| Group cables | Bundle with zip ties or clips because this minimizes clutter and reduces trip hazards. | Minimize clutter |
| Follow natural paths | Use desk edges to route cables because this keeps cables hidden and protected. | Keep cables hidden |
| Attach with clips | Secure along edges with cable clips because this prevents tangles and accidental unplugging. | Avoid tangles |

There’s a good chance your cables are already threatening to take over your workspace like a wild jungle vine. To tame that chaos, you need to secure those cords and stop them from tangling.
Important Measurement for Desk Cable Management:
– The cable clips should be placed approximately every 12 inches (30.5 centimeters) along the underside of your desk to ensure a secure and organized cable run.
Common Mistakes and How to Avoid Them:
Your power strip is probably the thorniest part of your workspace jungle. If you don’t tame it, it will continue to grow chaotically. Here’s the thing: don’t just dump everything on it and hope for the best.
Mount your power strip under your desk because most strips come with mounting holes. Use screws, not just tape, because tape doesn’t support the weight of all those chargers and adapters.
Organize adapters and cords with Velcro straps or twist ties because it keeps cables orderly and prevents tangling. Avoid letting cords hang free because it invites tangles and accidental yanks that can disconnect devices or cause damage.
Plug everything into a surge protector because a surge protector shields your devices from power surges and electrical spikes, protecting your equipment and data. Proper cable management not only safeguards your electronics but also extends their lifespan and ensures a clean, professional workspace.
Remember, the goal isn’t just to maximize space but to make your workspace organized so you can find what you need quickly without creating chaos.
You’ve probably been there, trying to untangle a knot of cords, only to realize one of them is mangled or, worse, half-detached from a device. First, identify the problem: is it a loose connection, a tangled mess, or a wiring incompatibility?
Untangling cords? Check for loose connections, damage, or mismatched wiring first. Patience saves time and frustration.
Extra tip: When rerouting cables, follow the manufacturer’s recommended bend radius typically 4 to 6 times the cable’s diameter to prevent internal damage.
The goal is simplicity.
Sometimes, a little patience and a quick review of your setup can save you hours of frustration.
Maintaining and rejuvenating your cable system isn’t just about tidiness, because it ensures everything runs smoothly and prevents future disasters. You’ve probably spent ages tightening screws only to realize your cables still look like spaghetti.
First, check your cable ties swap out any that are worn or too tight, because overly tight ties can cut into cables or cause damage.
Next, give everything a good wipe; dust and grime buildup are sneaky and contribute to wear over time. Use a damp cloth or a mild electronic cleaning wipe designed for cables and surfaces, because dust and grime can interfere with connection quality and accelerate deterioration.
If some cables seem a bit loose or outdated, replace or reroute them.
When rerouting cables, avoid crossing them unnecessarily or creating tight bends, because this can lead to increased wear and signal interference.
Important: Keep cables at a 90-degree bend or less near connectors to prevent damage, and ensure they don’t sag or hang loosely, as this can cause strain.
Here’s the thing: don’t wait until something stops working perform regular quick checks because preventative maintenance prevents the chaos of last-minute rewiring.
Schedule a thorough inspection every three to six months and perform quick daily visual checks.
A little upkeep now saves much bigger headaches later, because timely intervention prevents costly repairs or replacements and maintains optimal system performance.
You need to prioritize safety first. Always unplug cords before working underneath, obviously.
Secure cables firmly, but don’t overtighten, or you’ll damage insulation or hardware. Keep wires organized to avoid tripping or accidental unplugging. Make sure power strips are grounded properly and don’t overload circuits.
Avoid sharp bends or pinched cords those are recipe for shorts or fires.
All right, now that you’re safe, enjoy your tidy desk setup without worrying about electrical mishaps.
You should re-evaluate your cable organization every few months. Honestly, life happens cables fall behind, get tangled, or you upgrade gear.
I’ve learned the hard way that pulling everything out once or twice a year prevents chaos and saves time later. Plus, it’s a quick check-in to spot wear or damage.
Trust me, your future self will thank you for staying on top of it before cables turn into a tangled mess.
You can totally DIY a cable setup that’s just as effective as pro solutions, if you’re willing to put in a little effort.
All right, you might need some zip ties, clips, or sleeves but really, it’s about thinking logically. Sometimes, a simple strategic routing beats fancy gear.
Now, the key is patience and trial. I’ve seen pro setups look sleek, but honestly, your homemade version can look just as tidy if you avoid the temptation to overcomplicate it.
Did you know that 65% of household fires start due to electrical mishaps? Handling multiple devices with different power needs? Easy.
You gotta start by plugging high-power stuff (like desktops or monitors) into dedicated outlets or surge protectors. For lower-power devices, use separate power strips.
All right, avoid daisy-chaining multiple strips trust me, that’s the recipe for tripped breakers. Keep cables organized, label them, and make sure power loads don’t exceed socket ratings.
You should opt for eco-friendly cable ties made from biodegradable materials like cornstarch or hemp.
Reusable Velcro strips are gold easy to adjust and last forever, saving plastic waste.
Bamboo cable organizers look sleek and are sustainable.
Avoid cheap plastic clips they break easily and add to landfill clutter.
Trust me, using these options keeps your setup tidy and Mother Earth happy, all without sacrificing style or functionality.
All right, so here’s the thing cable management isn’t glamorous, but it’s totally worth it. Did you know that well-organized desks can boost productivity by up to 15%? So, next time you’re battling that nest of cords, remember: a little planning and the right tools can save you hours of frustration down the line. Trust me, you’ll thank yourself every time you sit down and your cables stay exactly where you want them.


