Physical Address
304 North Cardinal St.
Dorchester Center, MA 02124
Physical Address
304 North Cardinal St.
Dorchester Center, MA 02124

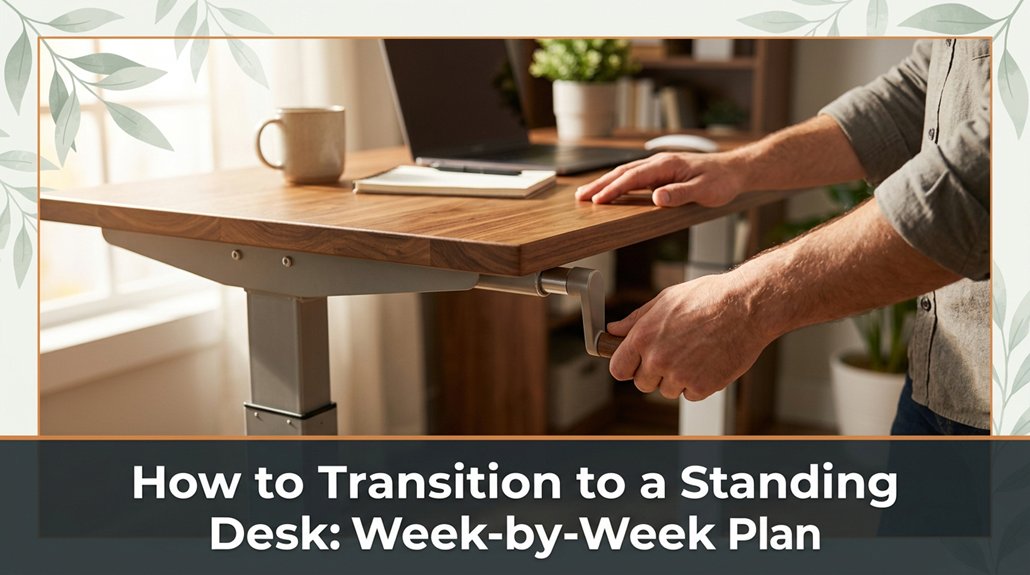
If you’re tired of the discomfort that comes with long hours at your desk, switching to a standing desk might be just what you need. Start by standing for 30-minute blocks enough to get used to it without feeling overwhelmed or cramped.
Then, gradually add 10-15 minutes each day, as if you’re easing into the worst hangover ever. Make sure your monitor isn’t eye-melting high keep it at eye level, about 20–30 inches away because neck pain really sucks. Keep moving, wear supportive shoes, and don’t stand like a statue.
Follow this plan, tweak it as needed, and pretty soon standing will feel way more comfortable and less like torture. Stick with it, and I’ll show you how to stay comfortable and avoid those common newbie pitfalls.
This article contains affiliate links. If you purchase through them, I may earn a small commission at no extra cost to you. I only recommend products I genuinely believe in.
You might feel sore or exhausted faster than you’d like, which is a clear sign to slow down. Take it one step at a time. Start with 30-minute intervals because gradual adaptation minimizes discomfort and reduces strain. Then, gradually increase the duration of standing periods.
Your body needs time to adapt trust me, I’ve seen people try to power through, only to end up benched with cramps. Respect the process, and your new standing setup will be sustainable and actually beneficial.
Key tips for a safe transition:
In addition, paying attention to posture can significantly decrease the risk of back pain while standing, ensuring your muscles stay relaxed but supported.
Common mistakes to avoid:
Look, setting up your workspace so it actually works for you is where the rubber hits the road.
First, raise your monitor until the top of the screen is at or just below your eye level, because looking slightly down reduces neck strain. Use a monitor arm if possible; if not, stack sturdy books under your monitor just be sure to double-check your monitor’s height before tightening any clamps because proper height is crucial for ergonomic comfort.
Second, position your keyboard so your elbows remain close to your sides and form a 90-degree angle the angle between your upper arm and forearm. Place your mouse at the same level, close to your keyboard, to keep your wrists straight and avoid overextension. This small move can significantly reduce wrist strain and prevent repetitive stress injuries.
Position your keyboard with elbows close to your sides at a 90-degree angle, and keep your mouse nearby to reduce strain.
Third, keep your workspace clear and clutter-free to prevent unnecessary reaching for items because clutter encourages poor ergonomics and distracts you from your tasks.
Fourth, aim for natural light when possible to enhance visibility, reduce eye strain, and boost productivity. If natural light isn’t available, use a desk lamp with adjustable brightness to provide consistent, glare-free illumination.
Finally, ensure your monitor is approximately 20 to 30 inches from your face, maintaining a comfortable viewing distance that aligns with ergonomic standards derived from OSHA guidelines. Keep in mind these specific facts:
Common mistakes to avoid:
Setting up a standing desk transition isn’t something you do all at once, and honestly, it’s better that way rip off the Band-Aid gradually instead of taking a sudden leap. So, create a schedule.
Start with 15 to 30 minutes of standing in the morning because beginning with small increments allows your muscles and joints to adapt gradually. Sitting for the rest of the workday remains necessary as you transition.
The next week, increase your standing time by 15-minute increments each day. For example, stand for 15 minutes in the morning on Day 1, then 30 minutes on Day 2, and so on, until your total standing time reaches about 2 hours per day. Trust me, waiting to feel comfortable takes time for your legs, your back, and your brain.
Measurement Fact:
– Aim to stand until your hips are at approximately a 90-degree angle and your knees are slightly unlocked, because this position minimizes strain and promotes proper circulation.
Don’t overthink the exact hours; focus on incremental progress. When you encounter a snag, such as sore calves or a monitor that feels too high or low, take a day or two to tweak your setup.
Common Setup Mistake:
– Placing the monitor too low causes neck strain, because it forces you to look down; instead, raise the monitor until the top of the screen is at or just below your eye level.
Adjusting Monitor Height:
– Raise the monitor until the top of the screen is at or just below eye level, which is approximately at 20 to 30 inches from your face, because this angle reduces neck fatigue.
Additional Tips:
Remember, proper posture during your transition is key to avoiding discomfort and ensuring long-term success.
This isn’t a sprint; it’s a slow, deliberate shift. Stick to the schedule, and you’ll be standing comfortably before you know it.
Maintaining good posture while standing might seem straightforward: stand upright, don’t slouch, right? But anyone who’s tried to hold a good position for more than five minutes knows it’s easier said than done. You’ll find yourself leaning forward, shifting your weight, or craning your neck.
Start with your feet shoulder-width apart, because this provides stability and balance. Keep your weight evenly distributed between both feet to reduce strain.
Engage your core slightly, because this stabilizes your lower back and helps maintain upright posture. Think of it as gently pulling your belly button toward your spine without tightening excessively.
Adjust your monitor so your eyes hit the top third of the screen, because this alignment prevents neck craning either downward or upward.
Position the monitor approximately 20 to 30 inches from your face, because this distance minimizes eye strain and helps maintain proper neck posture.
Lower the monitor until the top of the screen is at or just below your eye level, because looking slightly down reduces fatigue on the cervical spine compared to looking straight ahead or upward.
Do not lock your knees or stand rigidly, because this creates unnecessary tension and impairs circulation. Instead, keep your knees slightly bent and relaxed.
Stay relaxed but alert, because tense muscles can cause discomfort and fatigue over time. Being aware of ergonomic principles can help you maintain better posture during prolonged standing.

A water bottle on your desk might seem insignificant, but it’s actually a sneaky tool to keep you moving without thinking about it. You grab it, take a sip, and maybe stand up to stretch. It’s simple but effective.
Here are some other tricks:
When standing starts feeling uncomfortable, don’t immediately assume you did something terribly wrong; more often than not, your body just needs a little fine-tuning. All right, take a deep breath.
Your feet might need a better cushion try a high-density anti-fatigue mat or thick cushioned insoles in your shoes because this reduces pressure on your feet and ankles.
Use cushioned insoles or anti-fatigue mats to comfort your feet and reduce ankle pressure during prolonged standing.
Maybe your desk height is off. Adjust it so your elbows are at a 90-degree angle when typing, because this position minimizes strain on your shoulders and wrists.
If your lower back complains, it’s probably because you’re leaning forward or backward try to keep your hips aligned and maintain a neutral spinal posture.
Now, don’t push through pain. It’s your body telling you to tweak your setup. Remember, it’s a process, not a sprint.
And yes, I’ve wrestled with that stubborn monitor arm myself nothing is as simple as the manual claims.
Specific measurements or formulas:
Common mistakes and corrections:
– Mistake: Setting your monitor too high, forcing you to look up and strain your neck.
Correction: Lower the monitor so the top of the screen is at or just below eye level, because looking slightly down reduces neck strain.
– Mistake: Using shoes with minimal cushioning, causing foot fatigue during prolonged standing.
Correction: Wear shoes with thick, supportive soles or use a cushioned mat, because proper cushioning distributes weight evenly and alleviates foot discomfort.
– Mistake: Leaning forward at the desk, putting pressure on the lower back.
Correction: Keep your hips aligned and sit upright, because maintaining neutral posture reduces lower back strain.
– Mistake: Having your desk height too high or low, leading to shoulder tension.
Correction: Adjust your desk so that your elbows are at a 90-degree angle when typing, because this position minimizes shoulder and wrist strain.
Once you’ve dialed in the perfect setup and started feeling some relief, the real challenge is sticking with it long-term. You need to build habits that keep you motivated and prevent old desk habits from sneaking back in.
Extracted Fact:
– A recommended standing height formula for desks is: the top of the desk should be at elbow height when standing, with elbows at a 90-degree angle, because this positioning reduces strain on the shoulders and neck.
All right, don’t expect this to happen overnight your habits need time to solidify. Be patient, stay consistent, and remember that building lasting habits is a gradual process.
Turning your standing desk setup into a success story isn’t just about the desk itself; it’s about arming yourself with the right resources and tools, and trust me, there are plenty out there. You’ll want adjustable anti-fatigue mats because your feet will thank you. Choose mats that are at least ¾ inch thick and have a non-slip surface to provide cushioning and prevent accidents.
Monitor mounts that don’t turn your space into a tangled web are also essential. Look for monitor arms, like those from Ergotron LX or Fully J Desk Mounts, that allow height adjustment and swivel capabilities to keep your monitor at eye level.
Important measurement:
– Raise the monitor until the top of the screen is at or just below your eye level about 20 to 30 inches from your face, depending on your eyesight and desk height.
All right, get a timer or reminder app to keep you moving because it’s surprisingly easy to forget you’re on your feet. Consistent movement prevents fatigue and promotes circulation.
Now, I know what you’re thinking “Do I really need that fancy desk gadget?” Well, no, but ergonomic accessories help make your setup more comfortable and reduce strain. Look for accessories such as keyboard trays, footrests, and adjustable monitor arms that fit your specific workspace and ergonomic needs.
Common mistake to avoid:
Bottom line: the right tools and accessories make your adjustment smoother and, honestly, a lot more enjoyable. Proper setup ensures better posture, reduces discomfort, and helps you maintain your standing desk effectively over time.
If you’re wondering if a standing desk’s right for you, try standing for an hour or two at your current setup do your back ache? Do your feet get sore? That’s a sign it might help.
All right, but also, consider your routine and whether you can stand comfortably through your work. Obviously, it’s not a magic fix, but if those pains crop up, it’s worth exploring.
Yes, you can absolutely use a sit-stand desk in a small workspace.
All right, here’s the thing choose a model with a narrow footprint or a compact design. Keep your monitor and keyboard close to maximize space.
Now, don’t forget, you’ll need to organize cables carefully trust me, those tangles are the real enemy in tight spots.
Glad to help you squeeze productivity into that cozy corner!
All right, the hidden risk of rushing into standing too fast?
You might end up with aches, fatigue, or even musculoskeletal issues kind of like trying to run before you’ve learned to walk.
You’ll strain your back, legs, or neck at the worst possible moment.
So, take it slow. Your body’s not a switch; it’s a process.
Trust me, your future self will thank you for it.
You stay focused by taking breaks often, like every 30 minutes, to stretch and reset.
All right, I know standing sounds great, but your feet and back will complain if you ignore that. Shift your weight, move around a bit, and keep your mind engaged with tasks to prevent zoning out.
Honestly, if your mind starts wandering, it’s probably your body telling you to sit a moment.
Absolutely, go for an anti-fatigue mat. I’ve seen folks stand all day without one, and it’s like trying to balance on a volcano’s edge uncomfortable doesn’t begin to cover it.
The mat cushions your feet, reduces fatigue, and keeps you from feeling like you’re walking on concrete bricks.
Sure, it’s an investment, but trust me, your back, legs, and sanity will thank you.
All right, now you’ve got the plan and a handful of excuses to procrastinate less. Honestly, switching to standing isn’t rocket science it’s just about keeping consistent, listening to your body, and not trying to be a hero on day one. Remember, the seats weren’t made for eternity, and neither is your back. So, enjoy the process, tweak as needed, and soon enough, you’ll wonder why you ever sat so much at all.


