Physical Address
304 North Cardinal St.
Dorchester Center, MA 02124
Physical Address
304 North Cardinal St.
Dorchester Center, MA 02124

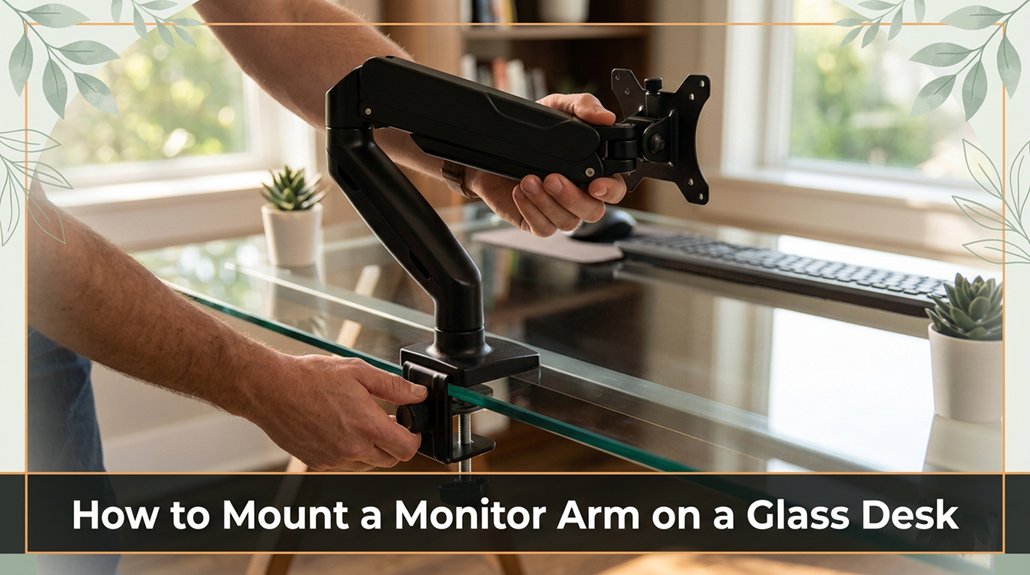
Mounting a monitor arm on a glass desk can feel daunting, especially if you’re worried about cracks or instability. Trust me, I’ve made my fair share of mistakes trying quick clamps that aren’t meant for glass.
You need high-quality clamps designed specifically for glass, with soft silicone pads to protect your surface. First, measure your glass thickness most clamps require at least 6mm. Loosen the clamp, carefully position it near the edge (but avoid the weak corners), then tighten gently no need to overdo it.
Keep an eye on the stability and check regularly for cracks or slippage that’s the best way to avoid accidental mishaps later. If you want to get this right, keep reading for the finer details.
This article contains affiliate links. If you purchase through them, I may earn a small commission at no extra cost to you. I only recommend products I genuinely believe in.
Ever wondered if you can actually mount a monitor arm on a glass desk without turning it into an expensive experiment? Honestly, yes if you do it right. A monitor arm on a glass desk can hold a monitor, but you’ve got to be smart about where and how you clamp.
All right, I’ve been there tried to tighten a clamp, then wondered if the whole glass would shatter. The key? Use high-quality, glass-specific mounting solutions because they’re designed to distribute pressure evenly and prevent damage.
Look, the biggest mistake people make is assuming all glass is the same. Sure, some toughened tempered glass can hold a clamp, but if your desk’s thickness is less than 0.5 inches or it’s made of fragile glass, forget it. You want secure mounting without cracking the glass.
Assuming all glass can handle clamps risks cracks check thickness and glass type first.
Measure the thickness of your glass desk; ideally, it should be at least 0.5 inches thick for safe clamping. Additionally, understanding the safe load capacity of your glass helps prevent accidents.
Research and select hardware designed specifically for glass surfaces, such as clamps with rubber padding, silicone tips, or vacuum mount systems, because these options reduce the risk of damage and provide better grip.
When mounting, locate a point on the glass that’s free from existing cracks or chips because these areas are more prone to shattering under pressure.
Position the clamp at a location where the pressure will be evenly distributed, ideally avoiding edges or corners, to minimize stress concentrations.
Tighten the clamp gradually and evenly, checking frequently to ensure you aren’t applying excessive force that might crack or deform the glass.
Remember, always follow the manufacturer’s instructions for the clamp or mount, because improper installation can lead to accidents or damage.
In summary:

Choosing the right hardware for mounting on glass isn’t just about grabbing the first clamp with rubber padding you see it’s about making sure you’re actually protecting that delicate surface while still getting a solid grip.
Look for clamps specifically designed for glass surfaces, such as those with soft, non-slip silicone pads and a snug fit. Don’t be tempted by generic C-clamps or cheap plastic mounts; they’ll slip or damage your glass faster than you can say “oops.”
First, measure your glass thickness in millimeters. For example, a typical glass thickness for desks or display cases ranges between 6 and 12 mm, so choose hardware compatible within that range because using incompatible mounts can cause slipping or cracking.
Second, determine the weight capacity of your glass surface and ensure the clamp supports at least 50% more than the weight of the mounted device to provide a safety margin.
All right, next: you need to check the clamp’s pressure. Tighten the clamp until it just compresses the non-slip pads enough to secure the device without causing stress on the glass.
Too tight, and you risk cracking your glass surface; too loose, and your monitor arm will wobble or slip.
Specify a tightening torque: tighten the clamp screws gradually, aiming for a force of approximately 0.3 to 0.5 Newton-meters, because applying excessive pressure increases the risk of damage.
Trust me, it’s worth the extra seconds to get it right. A proper fit ensures your equipment stays secure and your glass remains intact, providing safe, stable support for extended use. Additionally, choosing heavy-duty construction ensures increased durability and stability for long-term use.

There are a few essential steps you want to take before mounting that monitor arm, because skipping them can lead to a wobbly setup or a shattered glass top. First, thoroughly clean your glass surface. Dust and fingerprints are sneaky and can compromise the clamp’s grip, increasing the risk of slipping or shifting during use. Next, inspect your glass for any cracks or chips these can worsen under pressure, potentially causing the glass to break unexpectedly.
Check your glass’s thickness and weight capacity this information isn’t always obvious, but it’s crucial to ensure compatibility with your monitor arm.
Measured facts:
Here’s a quick reminder:
| Step | Why | What to Do |
|---|---|---|
| Clean the glass | Prevents slipping | Use a glass cleaner and lint-free cloth to remove dust and fingerprints |
| Inspect for damage | Avoid disasters | Look closely for cracks or chips that compromise integrity |
| Verify dimensions | Confirm proper fit | Measure thickness with a caliper and check the manufacturer’s weight capacity specifications |
All right, now you’re ready for the actual clamp setup.

Now that your glass is clean, free of damage, and you’ve confirmed it can handle your monitor’s weight, it’s time to attach that monitor arm.
First, choose the mounting style suction or clamp based on your setup. I’ll assume you went with the clamp because suction mounts often aren’t as reliable as clamp mounts.
Loosen the clamp because you need to position it correctly.
Position it on the edge of your glass, making sure it’s centered. Don’t just eyeball it; use a measuring tape or ruler to verify that the clamp is positioned symmetrically across the glass edge.
Ensure the clamp is tight enough to hold firmly without crushing the glass.
Tighten the clamp slowly because over-tightening can cause damage or cracks.
Once secure, attach the monitor to the arm.
Adjust the monitor’s position so that the top of the screen is at or just below your eye level, which is typically around 45–52 inches from the floor for an ergonomic setup.
Make sure the monitor is at a comfortable viewing distance of approximately 20 to 30 inches from your face.
Additionally, consider the arm’s weight capacity to ensure it can support your monitor’s size and weight safely.
Easy, right? Well, unless it isn’t.

Are suction mounts a good option for glass desks? Honestly, it depends. They sound simple: just push, press, and secure the mount. But in reality, your glass mightn’t be perfectly smooth or clean enough. If even a tiny dust particle lurks, the hold weakens, reducing stability. You might find yourself re-seating the mount after a few hours, worrying if your monitor is about to fall.
Additionally, suction cups don’t always work well with textured or slightly curved glass surfaces. They’re quick to install, but don’t expect the same level of stability as clamp mounts offer.
If your glass is pristine, flat, and your monitor isn’t too heavy for example, under 15 pounds (6.8 kg) they could work. But for peace of mind, most professionals prefer clamps or adhesive options.
Important: Use only high-quality suction mounts designed specifically for monitor or accessory support, and ensure the glass surface is thoroughly cleaned with isopropyl alcohol before installation.
Summary of key considerations:
Note: For added safety, consider using clamp mounts or adhesive-mounted solutions, especially if your setup involves heavier equipment or non-ideal glass surfaces.
Using adhesive mounts might seem straightforward: you clean the glass, stick the thing, and you’re done but there’s more to ensure it actually holds up effectively.
First, make sure the glass surface is spotless because dust, grease, or fingerprint smudges can prevent the adhesive from sticking properly. Use a high-quality glass cleaner such as Windex Original Glass Cleaner and dry the surface thoroughly with a lint-free microfiber cloth; this ensures maximum adhesion.
Next, follow the instructions provided with your specific adhesive mounts, such as Command Clear Mounts or 3M Command Strips. Most instructions recommend pressing firmly for about 30 seconds during application because this helps establish a strong initial bond.
When applying the mount, align it carefully before pressing, to avoid repositioning which can weaken the adhesive bond. Ensure that the adhesive is pressed and held firmly in place for at least 30 seconds to promote better contact between the adhesive and the glass surface.
All right, but here’s a critical point: don’t rush the curing process. Many adhesive mounts require a period of 24 hours before placing any weight or exerting pressure on them because the adhesive needs time to develop maximum strength.
Here is a specific fact:
The recommended curing time for most adhesive mounts before supporting weight is 24 hours.
Sometimes, you’ll wonder if that tiny strip of adhesive can support a monitor weighing 10 pounds or more. Trust me that patience pays off, and your desk will thank you later.
Moreover, understanding the importance of proper heat management can help ensure the longevity and safety of mounted devices by preventing overheating issues that may compromise the adhesive’s performance.
Here’s the thing: the issue might be uneven pressure or a tiny bit of dust on the glass interfering with grip. All right, double-check that the clamp’s pads are clean and in contact with the glass because dust or debris can reduce friction and compromise holding strength.
Next, verify you’re tightening evenly because uneven tightening can lead to poor grip and potential damage. Be careful not to over-tighten, because cracking the glass isn’t your goal.
Sometimes, you need a little patience and a gentle touch to avoid turning your sleek glass desk into a fragile masterpiece. Additionally, understanding the pressure distribution across the contact surface can help prevent flexing or damage.
Key Fact:
Glassy surfaces can flex under uneven or excessive pressure.
Step-by-step instructions:
Since a glass desk is delicate and unforgiving if treated wrong, keeping it stable and damage-free requires following a few simple rules.
First, always use padded clamps or mounting adapters specifically designed for glass, because sharp edges can dig in or slip if not properly protected.
Use rubber or felt padding under clamps to prevent scratching or cracking the glass surface.
Next, distribute weight evenly. Don’t hang your monitor or place heavy objects on one side for extended periods, because uneven weight can cause stress and potential cracks.
When mounting items, ensure the load is balanced across the desk surface.
Use nonslip pads on clamp surfaces to improve grip and reduce slipping, providing your desk with a gentle, stabilizing “hug” that minimizes movement.
Keep your glass clean and dry before mounting, because dust, dirt, or moisture can reduce grip and increase the risk of damage.
Additionally, understanding ergonomic corner desk setup principles can help you position your monitor and accessories properly to avoid unnecessary stress on the glass surface.
Regularly inspect your glass desk and mounted accessories for any signs of stress, cracks, or stress points, because early detection helps prevent catastrophic failure.
Tighten clamps slowly and incrementally, checking for any wiggle or cracks along the way to avoid applying excessive force that could damage the glass.
Follow these guidelines:
Important:
The recommended maximum tightening torque for clamps is 20 inch-pounds to prevent damage.
If you’ve ever tried to mount a monitor arm directly onto a glass desk, you already know it’s not exactly plug-and-play. You pick up the arm, then realize the clamp won’t grip glass or the suction cups slide off like soap.
Here’s the thing: You need an alternative.
Get creative by using a clamp-on arm designed for thicker surfaces because such arms typically support surfaces at least 1.5 inches thick. Then, attach a tempered glass top over your existing desk, creating a solid mounting point.
Use a thick-surface clamp arm with a tempered glass overlay for secure monitor mounting.
Alternatively, try desk grommets with adapters so you can run the cables and mount through a clean cutout. When using grommets, ensure the hole diameter is compatible with the clamp or mounting hardware, typically around 2 to 3 inches.
Remember: Stability’s king, so whatever method you choose, test it thoroughly before mounting your precious display.
Testing stability:
Common mistakes to avoid:
Ensuring your monitor mount stays safe and secure over time isn’t just about tightening the screws and calling it a day. You need to keep an eye on those fasteners, especially on glass components. Over time, vibrations and shifts in weight can loosen the mounting hardware.
Check the clamp grip every couple of months, because if you bump the desk or move it around, the clamp might loosen. Use a level to verify that the mount isn’t leaning or shifting, which could place stress on the glass.
Position the monitor so the top of the screen is at or just below your eye level, typically around 20 to 30 inches from your face, because proper positioning reduces neck strain and ensures stability.
Periodically tighten the screws, because plastic can relax and metal can settle over time. Tighten each screw firmly but avoid over-tightening, which could strip the threads or stress the mounting components.
Watch for any cracking, stress marks, or abnormal bulges on the glass, because these are signs that the mount or the glass itself may be compromised and could fail unexpectedly.
Highlighted Fact:
You can use a regular monitor arm on a glass desk, but don’t just clamp it and assume it’ll hold forever.
All right, you’ll need mount pads or special clamps with pads to avoid cracks.
Now, the concern’s always weight glass isn’t like wood.
So, make sure the arm’s weight limit matches your monitor, and use safety pads to distribute pressure.
Otherwise, you’re risking your expensive setup and a flying monitor.
You should aim for your glass desk to support at least 20-30 pounds more than your monitor arm’s weight capacity.
Think of it like a vintage jukebox if it’s not sturdy enough, it wobbles.
All right, the total weight includes the monitor, arm, and any other gear. Most glass desks can handle 20-30 pounds, but check the manufacturer’s specs.
Better safe than shattered.
Most brands like Ergotron, Vivo, and Jarvis offer monitor arms compatible with glass surfaces. Just make sure their clamps or mounting mechanisms suit your glass desk.
All right, here’s the thing: not all glass is created equal. Thickness, tempered or not these factors matter. Stick to brands that specify they’re glass-compatible, and always double-check the weight capacity.
Trust me, you’ll thank yourself when your monitor stays put no surprises.
You should use rubber pads or silicone grips when mounting on glass think of them as your desk’s protective armor.
Tighten the clamp gently, not like you’re trying to crush a can. Avoid brute force, or you’ll crack the glass faster than you can say “oops.”
All right, just make sure the weight isn’t overly concentrated, and check if your glass isn’t too thin sometimes, thinner glass isn’t friends with heavy mounts.
You definitely want additional hardware for extra stability. Trust me, just clamping it on isn’t enough your monitor will wobble faster than you can say “adjustment needed.”
Use rubber pads or mounting brackets designed for glass, and consider a weighted base or counterweights if possible. It may seem like overkill, but it’s worth avoiding accidental crashes, especially if your glass desk is on the thinner side.
Better safe than repainting your room.
Alright, so mounting a monitor arm on a glass desk isn’t rocket science just a bit of patience and the right tools. Think of it like a game of Jenga: go slow, make sure everything’s secure, and avoid the temptation to rush. You’re *not* building the Louvre here, but a stable setup is worth those extra minutes. Once it’s done, enjoy your sleek workspace just don’t forget that even Da Vinci took his time.


