Physical Address
304 North Cardinal St.
Dorchester Center, MA 02124
Physical Address
304 North Cardinal St.
Dorchester Center, MA 02124

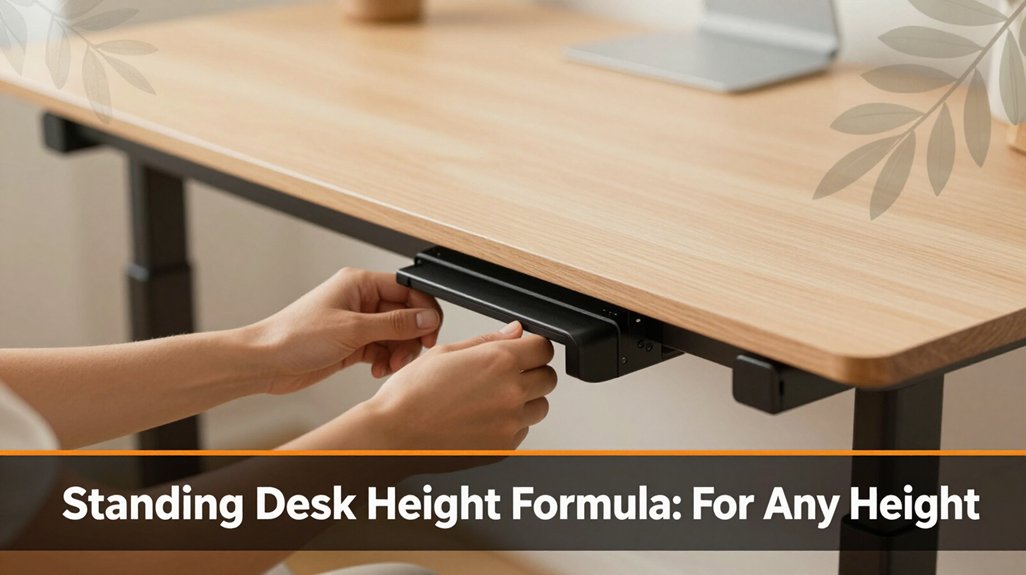
Standing at the right desk height can make all the difference between feeling comfortable and constantly fighting soreness. Your ideal standing desk height is based on your elbow height when you stand relaxed, with your arms at a 90-degree angle.
Measure from the floor to your elbow, then set the desk just below that so your shoulders stay relaxed, and your wrists are neutral. If you’re taller or shorter than average, adjust accordingly. Keep reading for tips on customizing your desk setup so it fits you perfectly, helping you stay comfortable and focused all day long.
This article contains affiliate links. If you purchase through them, I may earn a small commission at no extra cost to you. I only recommend products I genuinely believe in.
The truth is, figuring out the perfect standing desk height isn’t just guesswork you can actually calculate it, and it’s pretty straightforward. That’s where the standing desk height formula comes in.
All you need is your elbow height when you stand naturally with your arms at a 90-degree angle, relaxed, and palms facing down.
Your goal is to set the desk just below that elbow height because it keeps your shoulders relaxed and your wrists in a neutral position saving you from that awkward, strained feeling you get after a few hours.
Stand-up Desk Height Formula:
Set the desk height just below your elbow height.
Step 1: Measure your elbow height when standing naturally with your arms at a 90-degree angle, relaxed, palms facing down.
*Because this measurement represents the optimal height to align your arms for ergonomic comfort.*
Step 2: Adjust the desk to a height just below this elbow measurement.
*Because this position maintains relaxed shoulders and neutral wrists, reducing strain.*
Remember, this specific measurement approach helps you avoid common mistakes such as setting the desk too high, which causes shoulder shrugging and neck strain, or too low, which leads to wrist extension and discomfort.
Step 3: Monitor placement is equally important to ensure your neck stays aligned with your monitor, preventing strain during long work sessions.
Always double-check your measurements and make small adjustments to find the most comfortable height tailored for your body.

Here’s the honest truth: your height plays a surprisingly big role in this whole puzzle.
Here’s why your height matters:
Understanding this connection helps you tailor your workspace to your body so you can work comfortably, not just survive the day.
Key ergonomic adjustments based on height:
1. Adjust your desk height:
Set your desk height so that your elbows are at a 90-degree angle when resting on the surface, because this position minimizes shoulder strain. For typically average heights, this is approximately 28-30 inches from the floor, but measure your elbow height with your arms relaxed at your sides and bent at 90 degrees to determine your optimal desk height.
2. Position your monitor correctly:
Raise your monitor so that the top of the screen is at or just below your eye level, because looking slightly downward reduces strain on your neck and cervical spine. The ideal distance from your eyes should be approximately 20-30 inches, based on your arm length.
3. Adjust your chair height:
Set your chair so that your feet are flat on the floor, and your knees are at a 90-degree angle. This supports proper circulation and reduces fatigue because your thighs are parallel to the ground.
4. Use ergonomic accessories if needed:
For shorter stature, consider a footrest to ensure feet stay flat, and for taller individuals, an adjustable monitor stand or ergonomic keyboard tray can help maintain proper alignment because these adjustments prevent awkward postures and discomfort.
5. Remember that ergonomic adjustments can significantly improve comfort and reduce the risk of repetitive strain injuries.

Getting your standing desk height just right isn’t rocket science, but it does take a bit of measuring, because it’s similar to tuning a guitar just for your body. Now, you probably already know how you feel when your desk is too high or too low you’ve experienced that neck tilt or shoulder shrug moment.
Adjusting your desk height is simple, like tuning a guitar just for your body’s comfort.
Here’s the trick: stand up straight and relax your arms. Measure from the floor to your wrists your favorite comfortable position, not an effort to stretch or elevate because this provides a solid starting point for your desk height. Proper workstation configuration, guided by ergonomic principles, is essential for preventing chronic pain and injury.
Key measurement:
– From the floor to your wrists (with arms relaxed at your sides).
Adjust your desk height until:
– When typing, your elbows are roughly at a 90-degree angle, because this position reduces strain on your shoulders and forearms.
Step-by-step instructions:
Additional tips:

When you finally nail down the right desk height, it’s like you’ve uncovered a secret to comfort you didn’t even know was hiding there. There’s a simple formula you can use that works for almost everyone. Here’s the gist:
All right, it might sound too simple, but trust me, that’s the goal. When everything lines up, your body stops fighting you no more neck cricks, shoulder pulls, or lower back aches. It’s that easy.
Key Measurements and Formulas:
Common Mistakes and How to Fix Them:
Adjusting your desk height for personal comfort might seem straightforward, but I’ve learned it’s more than that. You want your elbows at about a 90-degree angle because this position minimizes strain on your shoulders and forearms. Keep your wrists straight to prevent repetitive strain injuries like carpal tunnel syndrome.
Moreover, your monitor should be at eye level, positioned about 20 to 30 inches from your face, to reduce neck strain. Think of it like setting up your throne: you want to feel supported, not like you’re balancing on a wobbly pillow.
Keep your monitor at eye level, 20 to 30 inches away, for a supportive, strain-free workspace.
When you stand, your hips should be stacked directly under your shoulders; this helps maintain proper spinal alignment. Your hips should be level or slightly higher than your knees when standing, because this promotes better posture and reduces lower back discomfort.
All right, you’re probably used to hunching or slouching, but the key is finding that sweet spot where your body feels natural and relaxed. Ensuring proper ergonomic setup can significantly alleviate back pain and improve comfort during long work hours.
Specific measurements and setup tips:
Common ergonomic mistakes include:
One of the biggest mistakes you might make when setting up your standing desk is forgetting that your body isn’t a fixed machine: it’s a dynamic system that needs small adjustments, not blind guesses.
You might set the height based solely on how tall you are, without considering your natural posture or how you feel after an hour.
All right, here’s the thing: your neck, shoulders, and back will tell you if something’s off, so listen.
Important measurement:
Elbow height for desk setup: When standing comfortably, measure from the floor to your elbow; set the desk so the keyboard height is level with this measurement.
– Don’t stand in the same position for too long, regardless of the desk height, because static posture can cause muscle fatigue and circulatory issues.
Trust me, small tweaks are your friends your body will thank you. When you customize your workstation based on ergonomic guidelines, you can prevent discomfort and injuries over time.
Getting your setup just right isn’t only about the height of your desk. Accessories can make a huge difference in keeping you comfortable and avoiding those annoying aches.
You’ve probably experienced that weird neck tilt or shoulder tension that sneaks in mid-afternoon. Here’s the thing: adding a good ergonomic chair cushion, a footrest, or wrist padding can shift your posture into the zone where you actually feel good.
A monitor riser or adjustable arm keeps your screen at eye level, because looking slightly down reduces neck strain more effectively than looking straight ahead or upward.
For example, raise your monitor until the top of the screen is at or just below your eye level. Position the monitor 20 to 30 inches from your face to minimize eye strain.
All right, it might sound like a lot of small stuff, but these tiny tweaks break the cycle of discomfort, helping you stand longer without paying for it later.
Common Mistakes and How to Fix Them:
Better accessories are your secret weapon for a happier, less achy workspace.
If your standing desk setup is really working for you, you’ll start noticing some pretty subtle but important signs.
You feel energized instead of exhausted after a long work session because your body stays active and refreshed.
No more that weird neck tilt or sore lower back after a few hours because your monitor is positioned at eye level about 20 to 30 inches from your face and your desk height allows your elbows to be at a 90-degree angle when typing.
Your arms and wrists aren’t aching from awkward angles because your keyboard and mouse are positioned so your wrists stay straight, aligned with your forearms.
Your eyes stay happy minimal eye strain or squinting because your monitor is well adjusted for glare and is about an arm’s length away, generally 20 to 30 inches.
And here’s the thing: when you switch from sitting to standing, there’s no sudden jolt of discomfort, just a gentle shift.
Lower your standing desk height to match your elbows at a 90-degree bend, because maintaining a neutral arm position reduces strain.
Adjust your monitor so its top aligns with your eye level, because this prevents neck tilting and reduces cervical spine fatigue.
Ensure your monitor is positioned approximately 20-30 inches from your face, because this distance minimizes eye strain and promotes comfortable viewing.
If your feet are supported on the ground or footrest and your knees are roughly at a 90-degree angle, your standing position is ergonomically optimized.
Your body finally says, “Cool, this is comfortable,” instead of fighting against gravity or oscillating wildly between pain and relief.
All right, you’ve probably noticed that moving from sitting to standing isn’t as simple as just flipping a switch. You feel that moment where your legs are like, “Hey, we’re doing this now?” and your back’s unsure if it’s ready.
Here’s the thing: rushing into standing straight away can leave you feeling dizzy or even sore. Instead, take it slow.
Start with short intervals maybe five minutes and gradually increase the duration as your body adapts because this allows your muscles and joints to adjust safely. Use a stable surface, like a sturdy desk or countertop, to support yourself if needed, especially during the transition because this provides stability and prevents falls.
Pay attention to your posture during the movement. Keep your feet flat on the ground, roughly shoulder-width apart, and ensure your knees are slightly bent about 10 to 15 degrees so your muscles can support the transition smoothly. Engage your core muscles to maintain stability and protect your lower back during the movement.
If you’re unsure about how to support yourself, place your hands on the armrests or the edge of your desk to help lift your body because this reduces strain and prevents sudden loss of balance.
Remember, your body’s learning this new rhythm, so don’t be discouraged if it feels awkward. Your muscles and joints need time to adjust, just like any new exercise.
Be patient and consistent to develop safe and comfortable movement habits.
Now, when you’re finally up and standing at your desk, the real game begins, making sure those hours don’t turn into a backache or a neck cramp. You want your setup to feel natural, not like a wrestling match between your body and furniture.
Stand comfortably at your desk to prevent back pain and neck cramps your body should feel natural, not like a wrestling match.
Here are some tips:
Important measurements:
Common Ergonomic Mistakes and Correct Practices:
Standing at your desk might seem straightforward: set it to the right height, and you’re good to go. But if you’re feeling neck strain, back pain, or arms that feel like they’re trying to escape, you’re probably not alone. Troubleshooting starts with asking, “Is my desk at the right height?” Sometimes, it’s the tiniest tweak, like raising or lowering a few inches, that makes all the difference.
Here’s a quick guide:
| Issue | Solution |
|---|---|
| Neck pain | Desk too high or too low adjust accordingly because proper height reduces strain on the neck muscles. |
| Back aches | Confirm your hips are open sit back in the chair with hips at a 90-degree angle and monitor your posture because poor alignment leads to lower back discomfort. |
| Arm discomfort | Keep elbows at 90° because this position minimizes strain on the shoulders and forearms. Avoid shrugging or slouching to maintain optimal ergonomics. |
Additional Tips for Desk Height Adjustment:
Common mistakes:
Optimizing your standing desk height involves precise measurements and awareness of ergonomic standards to prevent discomfort and promote long-term comfort.
Yes, your desk height can definitely vary throughout the day. As you move, stretch, or even feel a little tired, your body shifts your shoulders might droop or your arms settle differently.
All right, your comfort is dynamic, not fixed. Just keep in mind, your ideal desk height is a sweet spot, but it’s okay if it fluctuates a bit.
Listen to your body and make small adjustments when needed.
When you change footwear or your posture, think of your desk as a chameleon.
You’ll want to tweak the height slightly about an inch or two so your elbows stay at a comfortable 90 degrees and your wrists stay straight.
All right, and here’s the thing: for thicker shoes, raise the desk a tad; for barefoot or lighter shoes, lower it.
Trust your body’s signals; if your shoulders tense or back aches, make another small adjustment.
Absolutely, a standing desk can work for all body types, but you’ll need to fine-tune it.
You know that feeling when your back starts to complain, or your shoulders hunch? That’s your body signaling you need the right height.
All right, think of your desk as a custom-fit suit. You want your elbows at about a 90-degree angle, your screen at eye level, and you won’t be doing awkward neck gymnastics all day.
You gotta keep moving, even at a standing desk.
All right, try shifting your weight from one foot to the other, or do small leg lifts every now and then think of it as giving your muscles a tiny pep talk.
Walk in place, stretch your arms overhead, or do squats if you have space.
Your body craves movement, and honestly, it’ll thank you by reducing that nagging tired, stiff feeling.
If you get your desk height just right, you’ll notice long-term benefits like less neck strain, reduced back pain, and better posture. It helps keep your shoulders relaxed and your spine aligned, so you don’t feel like you’ve been run over by a truck after a long workday.
Plus, standing at the proper height promotes movement, which prevents stiffness and keeps your blood flowing goodbye, sluggishness!
Alright, so you now know how to set your standing desk to fit *you*. It might take a bit of trial and error like finding that sweet spot where your shoulders stay loose, your back feels supported, and you can breathe easy. Remember, it’s about comfort, not perfection. Keep tuning, stay mindful, and soon standing will feel natural, like a dance you’re finally leading instead of just trying to keep up with. You’ve got this!


