Physical Address
304 North Cardinal St.
Dorchester Center, MA 02124
Physical Address
304 North Cardinal St.
Dorchester Center, MA 02124

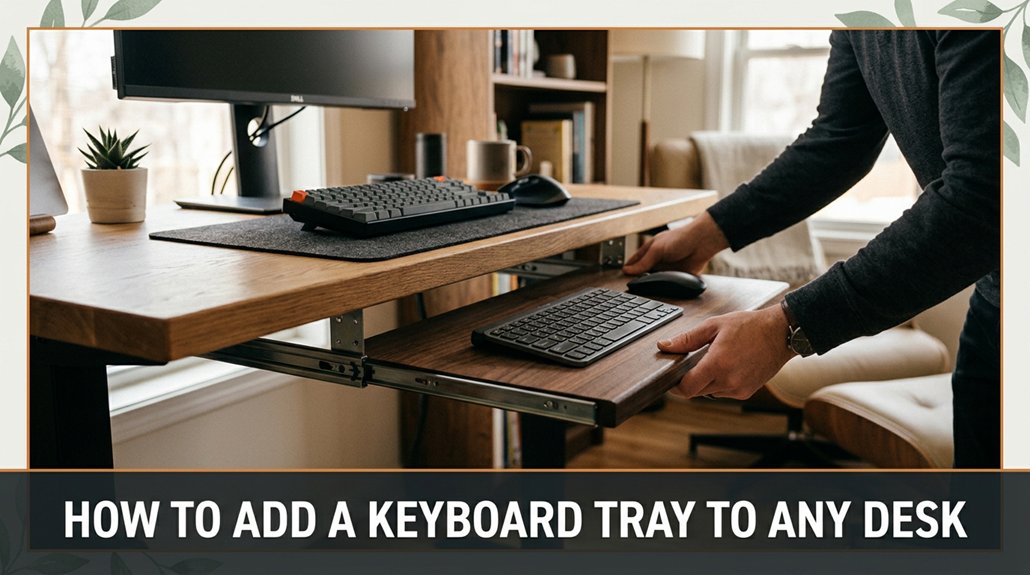
Adding a keyboard tray to your desk might seem like a hassle, but it’s actually pretty straightforward if you know what to watch out for. First, make sure your desk’s surface is at least 1.5 inches thick so the clamp will stay in place without slipping off.
Measure your available space and consider your monitor height this way, the tray won’t wobble into your coffee or block your view. Attach the brackets securely, but don’t over-tighten or you risk cracking the surface. Finally, adjust the height and tilt until it feels just right. Follow these steps, and you’ll avoid common pitfalls, making your workspace more comfortable with ease.
This article contains affiliate links. If you purchase through them, I may earn a small commission at no extra cost to you. I only recommend products I genuinely believe in.
Now, before you get excited about installing that sleek keyboard tray, let’s take a quick reality check because you need the right desk and setup for it to actually work.
Keyboard tray installation isn’t just about screwing things in; it’s about having enough space and proper structure.
Is your desk thick enough? Will the tray interfere with your monitor or other gear? It’s important to consider these factors because an incompatible desk can cause installation issues or reduce ergonomic benefits.
Assess your workspace by measuring the available space specifically the length, width, and height. Think about how you’ll access cables and your comfort while working. For example, position your keyboard tray so that your elbows rest at a 90-degree angle when typing, because this reduces strain and improves ergonomics.
If your desk’s surface isn’t stable or is made of flimsy material like thin particle board, don’t bother installing a tray there. A wobbly tray can cause instability and discomfort during use, especially when typing or reaching for items.
Key Measurements to Take:
Common Mistakes and How to Avoid Them:
Ever tried choosing a keyboard tray and felt like you needed a degree in engineering? All right, here’s the thing: first, measure your space because you want a tray that fits comfortably without sticking out excessively or feeling cramped. Don’t just eyeball it; grab a tape measure to obtain accurate dimensions.
Next, consider your setup: do you need an adjustable height? If so, check the tray’s tilt and slide features to ensure they meet your ergonomic needs.
Now, think about weight capacity. Your monitor and keyboard together can be quite heavy, so choose a tray with a sufficient weight capacity. For example, most keyboard trays have a weight capacity ranging from 10 to 20 pounds; ensure your setup doesn’t exceed this limit to prevent damage or unsafe instability.
Finally, verify compatibility. Most trays are universal and attach via clamp-on or rail-mount systems, but some models might require extra mounting hardware. Make sure the tray you select is compatible with your desk and installation preferences.
Your goal is to find a tray that fits your workspace, supports your ergonomics, and is easy to install and use so, pick one that aligns well with your workflow and comfort needs, not something that’s a hassle to set up or operate. Properly supporting ergonomic setup can help reduce carpal tunnel symptoms and make your workspace more comfortable.
Installing your keyboard and mouse tray isn’t exactly rocket science, but I’ll admit, it’s often more about patience than complexity. You might end up holding the tray with one hand while trying to tighten the screws with the other, because stability helps ensure proper alignment. First, locate your mounting brackets; they usually come with clear instructions, though it’s wise to double-check to prevent errors.
All right, attach the brackets to your desk because securing them firmly is essential for stability. This step is straightforward unless your desk has an unusual shape or material; ensure the brackets are tightened snugly without over-tightening, which could damage the desk surface.
Next, hang the tray on the brackets; this can be tricky if you don’t align everything just right. Make sure the tray’s mounting hooks or slots are properly seated on the brackets, because improper alignment can cause wobbling or detachment.
Tighten the screws securely to lock the tray in place because loose screws may lead to instability or accidental detachment. Use a screwdriver appropriate for the screw type, typically Phillips or flat-head, and turn clockwise until firmly tightened without stripping the screw or damaging the mounting holes.
Remember, if something doesn’t seem to fit, don’t force it. Sometimes, a quick readjustment makes all the difference. If needed, loosen the screws slightly to realign the tray before tightening again.
Ensuring the stability of mounting brackets contributes greatly to the overall safety and functionality of your ergonomic setup.
You probably expected adjusting your keyboard tray to be as simple as flipping a switch or sliding it into place, but that’s not always the case. First, find the perfect height your elbows should be at about a 90-degree angle when typing, because this reduces strain on your forearms and shoulders. Use a tape measure to ensure the height, rather than eyeballing it, for precise adjustment.
Measurement Note:
Elbow height when seated with arms at a 90-degree angle from the floor is typically around 25 to 30 inches, depending on your height.
Next, position the keyboard tray so the top is level with or just slightly below your elbows when seated, to promote a neutral wrist position.
Adjust the tilt of the tray by tilting it slightly downward at about a 10 to 15-degree angle. This downward tilt helps to avoid wrist strain and encourages a more natural hand position while typing.
If your keyboard tray has adjustment screws, tighten or loosen them as needed to secure your chosen height and tilt. Always verify stability after adjusting.
Tip:
Your setup is highly personal. What works for someone else mightn’t work for you. Therefore, move the tray around, testing different heights and angles.
Once adjusted, type for a few minutes. Ensure your wrists feel comfortable, and that your back doesn’t ache after an hour of work. Fine-tune the setup until you experience no discomfort during extended use.
Common Mistakes to Avoid:

Sometimes, the hardest part of adding a keyboard tray isn’t the actual physical mounting but figuring out if it’ll even fit where you want it to. Measure your desk carefully specifically, the width, depth, and available clearance underneath because inadequate measurements can lead to improper fit or instability.
Ensure the desk has enough space for the tray to sit securely; for example, if your desk has a thick veneer or built-in drawers, the clamp may struggle to grip effectively. Check the mounting instructions thoroughly, as they often assume a generic desk setup, which mightn’t match yours.
Look for potential clearance issues; for instance, if the desk has a lip or uneven surface, the tray could wobble or not fit at all, leading to unstable mounting.
Here are some key points to keep in mind:
Additionally, understanding the desk surface features such as thickness and surface irregularities can help you choose the appropriate mounting method or adjustments for a secure fit.
Do not force the tray into place if it doesn’t fit; forcing can damage the tray or the desk. Instead, try making adjustments or using alternate mounting brackets designed for desks with non-standard features.
Ultimately, understanding the specific quirks of your desk such as thickness, surface irregularities, and clearance is vital for a secure and functional installation.
Remember: careful measurement, attention to detail, and adaptation are key because there’s no one-size-fits-all solution.
A big part of making your workspace comfortable without breaking the bank is coming up with creative DIY or budget-friendly keyboard tray ideas.
Here are four tricks I’ve actually tried and survived:
1. Old Drawer: Clear out a surplus drawer, attach it underneath your desk with brackets because this provides a sturdy, flat surface for your keyboard and helps keep your tabletop clutter-free.
2. Cinder Blocks & Wooden Plank: Stack cinder blocks for height because this allows customization based on your ergonomic needs, then lay down a sturdy wooden plank on top because it creates a firm, even surface that can support your keyboard.
3. Transparent Plastic Storage Box: Cut the storage box to the size of your keyboard because this ensures a snug fit, drill some holes in the bottom for ventilation, and slide it beneath your desk because it’s cheap and surprisingly durable. Proper monitor height can help you set up your workspace to prevent strain, so consider how your new tray fits into overall ergonomic standards.
Highlight:
– Use a plastic storage box approximately 2 to 4 inches tall to ensure adequate clearance for cables and ventilation.
4. Metal Shelf: Install a wall-mounted mini-shelf at the appropriate height because this minimizes clutter and provides quick access to your keyboard.
Position it so the top surface is approximately 27 to 30 inches from the floor, aligning with ergonomic standards for keyboard height.
All right, don’t overthink it just pick what works for your space and get creative.
Chances are, once your keyboard tray is in place, the real work begins, making sure it stays in good shape long after you’ve stopped thinking about it.
First, give it a quick wipe with a damp cloth weekly because dust and crumbs can accumulate and cause buildup over time.
For stubborn spots, use a mild cleaner or a vinegar-water mixture because these options effectively remove grime without damaging surfaces just don’t soak the metal or your desk.
Check the mounting hardware every few months because loosening screws can lead to wobbly trays and potential breakage.
Look, if you’re using the keyboard tray daily, don’t ignore squeaks or sticky slides because they signal the need for maintenance; addressing them promptly keeps the tray functioning smoothly.
Avoid abrasive scrubbers because they can scratch surfaces and promote degradation over time.
Keep the track mechanisms clear of debris because dirt or small objects can jam the sliding parts, causing uneven movement.
Specific fact:
– To prevent debris buildup in track mechanisms, clean them weekly with a soft brush or compressed air.
By following these steps, you’ll extend the life of your keyboard tray and your sanity.
Adding a keyboard tray isn’t just about freeing up desk space, although that’s a nice perk. It’s about making your work life significantly more comfortable and efficient. When you add a tray, your wrists stay neutral because the tray positions your keyboard at a height that minimizes wrist extension and ulnar deviation, reducing strain and preventing repetitive strain injuries. Proper ergonomic setup encourages better posture habits, which further alleviates back and neck pain associated with working from home. Additionally, you’ll find that your posture naturally improves because your monitor is now at eye level, not crane-your-neck height.
A keyboard tray promotes neutral wrist positioning, reducing strain and preventing repetitive injuries for a more comfortable workspace.
Here’s why you’ll love it:
Yes, you can install a keyboard tray on a standing desk, but it’s not always straightforward.
You’ll need a tray designed for adjustable desks or one with clamps that won’t interfere with height adjustments.
All right, first check your desk’s material and thickness.
Then, select a tray with mounting options compatible with your desk’s frame.
Expect some trial and error because, of course, the width or screw holes mightn’t match perfectly.
You’ll want durable materials like high-quality steel or thick, reinforced plywood.
Statistically, steel lasts longer up to 30 years in some setups so it’s a smart investment. You’ll need a sturdy frame that can handle daily use without sagging.
I’m sure you’ve been 45 minutes into assembly when a flimsy tray warped after a few weeks trust me, go heavy-duty, and you’ll save yourself that headache.
No, keyboard trays don’t usually interfere with desk drawers or storage unless you install one that extends into that space.
All right, you’ll want to measure your desk’s depth and clearance first trust me, assuming everything’s a perfect fit never ends well.
If your desk has shallow drawers, look for a tray that mounts underneath or uses a slide-out design.
Otherwise, you risk blocking your storage, and nobody wants that post-assembly surprise.
Yes, adjustable keyboard trays suit most desk types, but not all. Think of it like sunglasses most fit broadly, but some frames just don’t sit right on certain face shapes.
You’ll want to check your desk’s material and surface thickness first. All right, if you’re working with a packed desk or uneven surfaces, some trays might wobble or won’t clamp tight.
Just know, they’re versatile but not magic measure first to avoid surprises.
You want to stop squeaking or rattling, right? Start by tightening all mounting bolts the tiniest looseness can turn into noise.
If that doesn’t cut it, add a little lubricant seriously, a drop of WD-40 on the moving parts does wonders.
Double-check that the tray’s securely attached and not wobbling.
Alright, so you’ve just added a keyboard tray without losing your mind or your temper. Who knew that something so simple could be such a saga? Just remember, measure twice cut once, or in this case, mount once and don’t forget to double-check your adjustments. Now you’ve got a setup that’s ergonomic, efficient, and entirely your own. Congrats! You’re officially the boss of your workspace no more awkward stretches or cramped clicks.


