Physical Address
304 North Cardinal St.
Dorchester Center, MA 02124
Physical Address
304 North Cardinal St.
Dorchester Center, MA 02124

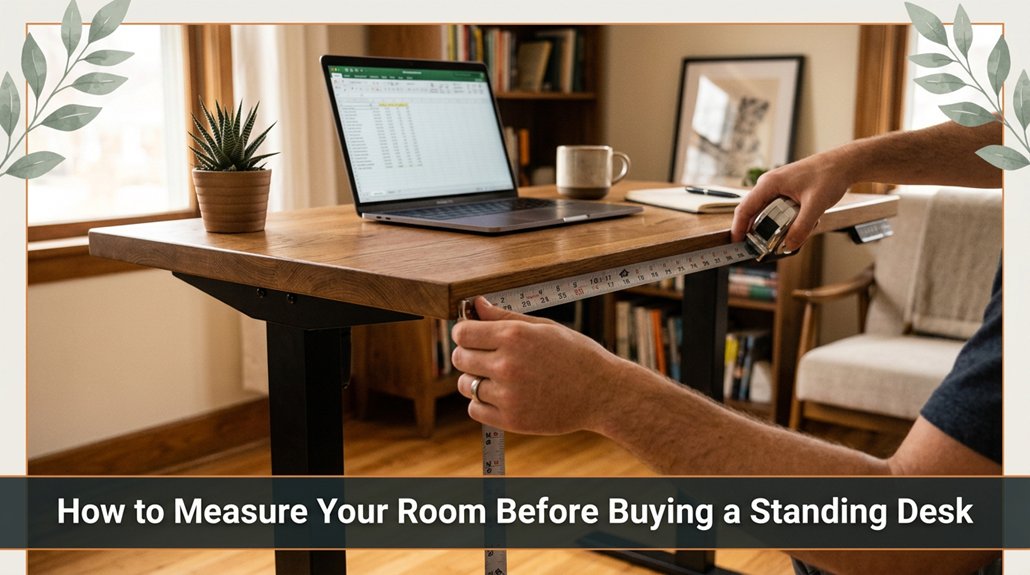
Getting your room measurement right is the crucial first step before buying a standing desk you don’t want to discover afterward that it doesn’t fit or blocks your door. Grab a tape measure; assuming your space is perfectly square often leads to surprises later.
Measure the length and width carefully, and check twice floor unevenness can throw off your plans. Don’t forget to measure ceiling height if you want to avoid bumping your head or missing out on lighting fixtures.
Mark your ideal spot with painter’s tape, making sure there’s enough room for movement and accessories. Thinking ahead about future gear and doorways now will save you a lot of headaches when that new standing desk finally arrives.
This article contains affiliate links. If you purchase through them, I may earn a small commission at no extra cost to you. I only recommend products I genuinely believe in.
Ever wonder if you’re measuring your room correctly when setting up a standing desk? Honestly, I’ve been there, holding a tape measure and hoping I don’t mess up.
The first step to measure your room for a standing desk is straightforward but essential. Grab your tape measure and find the spots where you want the desk to go. Measure the distance from wall to wall where the desk will fit because accurate length measurement ensures the desk fits comfortably without obstructing walkways or other furniture.
Measure wall to wall for your standing desk to ensure a perfect fit without blocking walkways or furniture.
Remember, it’s not just about the length height also matters. Check ceiling clearance to ensure there’s enough space above the desk for comfortable movement and accessories like monitor arms or shelves.
Measurement Tips:
Important fact:
*Ceiling clearance should be at least 36 inches above the top surface of your standing desk to allow for comfortable movement and any attached accessories.*
Perform these measurements carefully because once you buy a desk that’s too large, you’ll face difficulties fitting it into your space. Also, consider stability and weight capacity to ensure the desk can support your equipment safely.
Step-by-step instructions:
Common Mistakes and How to Avoid Them:

When it’s time to measure your room length and width, don’t just grab your tape measure and guess. All right, pull out the tape, stretch it from wall to wall as straight as possible because a straight measurement ensures accuracy, avoiding errors caused by sagging or bouncing.
Keep the tape flush against the wall, not at an angle otherwise, your measurements will be off, and your furniture or desk placement might be incorrect.
Now, write down the number. Repeat for the other dimension, because recording both measurements ensures you have the complete size of your space.
Measurement Tips and Common Mistakes:
Technical Fact:
Trust me, it makes all the difference. Be precise, don’t rush, because your space’s actual size is the foundation for furniture placement, decor layout, or renovation planning.
Accurate measurements ensure everything fits perfectly and looks professional in the end.

There are a couple of important checks you need to do before you set up that sleek new standing desk specifically, verifying your ceiling height and making sure your floor isn’t playing tricks on you. All right, grab a tape measure and a level.
First, measure your ceiling height at several spots because ceilings can be uneven. To do this, position your tape measure at eye level near each spot and record the height. You want to ensure your desk won’t hit the light fixture or sit too low, leaving you barely inches below it.
Next, check the floor for levelness. Place the level on the ground against the intended desk area and observe whether the bubble is centered. Because uneven floors can cause wobbling or tilting, ensure the surface is flat for a stable workspace.
If the floor is unlevel, your solution might be as simple as using shim materials like wooden or plastic shims, or placing an anti-fatigue mat with a thicker base both to prevent wobbling and ensure comfort.
Highlighted fact:
Floor levelness should be checked with a carpenter’s level, ensuring the bubble is centered between the marked lines for true levelness.

Alright, this is where most setups go sideways: marking the spot for your standing desk. You’ve measured everything, but now you need to actually choose the correct location.
Obviously, you want it centered in the room; however, sometimes walls slope, or an outlet might be incompatible with your ideal position.
Step 1: Grab painter’s tape or a pencil and mark the corners of where the desk should go because this helps ensure accuracy and prevents repositioning multiple times.
Step 2: Don’t just eyeball it use a tape measure to confirm the placement because eye estimates can be imprecise, leading to awkward positioning later.
Step 3: Aim for a spot that leaves enough room to stretch and move around, rather than squeezing it in because “the room’s there.”
Step 4: Measure the distance from the proposed desk location to nearby furniture and windows. Double-check these measurements to avoid crowding or obstructing access because clear space promotes comfort and ease of movement.
Important Fact:
– Leave at least 24 to 36 inches of clearance in front of the desk for comfortable standing and movement.
Additional Tip: Considering the stability of your setup during use can prevent unnecessary wobbling or shifting, ensuring your workspace remains reliable.

Now that you’ve marked where your standing desk should go, it’s time to check for furniture obstructions and clear pathways.
Imagine yourself maneuvering around your room because you want to avoid trip hazards that could cause injury or damage.
Look out for:
Step 1: Clear the area of any furniture or items that might obstruct the space, because obstructions can impede safe movement and cause accidents.
Step 2: Remove or reposition chairs, carts, lamps, small tables, and other furniture blocking your designated standing desk location.
Step 3: Tidy up cables and power strips, such as those connected to your computer and accessories, because tangled cords can create trip hazards.
Step 4: Secure or reposition rugs and carpets that could catch or slip under your rolling chair.
Step 5: Adjust or move shelves and cabinets that are within bumping distance of your workspace, because hitting them when moving or adjusting can lead to injury or damage.
Step 6: Take into account ergonomic flexibility, as an organized space allows you to easily switch positions and stay comfortable.
Key Measurement: Maintain a clear walking path of at least 24 inches wide because this provides sufficient space for safe movement around your furniture and avoids congestion.
Brutally Honest Tip: If anything feels tight or cluttered, move or reorganize it now before purchasing the desk, because cluttered spaces lead to bumps, frustration, and potential injury later.
If you’ve ever tried to measure a room without the right tools, you know it’s basically asking for trouble, because inaccurate measurements can lead to poor fit and costly mistakes like trying to cut fabric with blunt scissors.
First, grab a tape measure or a laser distance meter. Tape measures, such as the Stanley Powerlock 25-foot tape, are inexpensive and familiar, but the laser distance meter such as the Bosch GLM 50 C is faster and offers higher precision.
Measure multiple times to ensure accuracy, because repeated measurements help identify inconsistencies and prevent errors.
Standout Fact:
Laser distance meters typically have an accuracy of ±1/16 inch (±1.5 mm) within a 65-foot range, making them ideal for precise room measurements.
Use a tape measure by extending it along walls and corners, ensuring it’s straight and taut. For laser devices, position the laser target at the exact corner or edge to get an accurate reading.
Don’t eyeball measurements, because estimation can lead to errors; always double-check with a second measurement.
Step 1: Measure the length of each wall at least twice and record the readings because repeated measurements reduce chance errors.
Step 2: Use a notebook, smartphone, or camera to record your measurements clearly write them down, snap a photo, or both so you avoid scrambling to remember details during installation.
Be precise:
Record measurements to the nearest 1/8 inch for room planning purposes.
For example, write down wall lengths like 12’3 1/4” or 9’10 3/8”.
Common Mistake:
Measuring at an angle instead of along the wall can cause inaccuracies. Always ensure the tape or laser beam is aligned perfectly parallel to the wall for true measurements.
Investing in a quality laser distance meter helps eliminate guesswork, especially when measuring large or awkwardly shaped rooms.
Always record your measurements clearly because accurate data saves time and frustration during furniture placement, flooring, or designing.
There are probably at least three things you’ll forget when measuring your room for a standing desk one of them being how to account for the pesky things like windows, doors, and power outlets that are actually in your way, not just along for the ride.
Here’s what to keep in mind:
Important facts:
Basically, don’t ignore these obstacles they’ll be the reason your setup feels all wrong.
Always map out the exact placement of windows, doors, outlets, switches, and trims, and plan your desk placement accordingly to ensure ergonomic comfort and functional usability.
Creating a visual map of your room layout is like drawing a treasure map, only instead of gold, you’re figuring out where your perfect standing desk will live. Start by sketching your space on paper, no fancy tools needed just a rough outline because this helps you visualize the overall flow. Place your existing furniture into the drawing to see what’s non-negotiable. For example, identify large items like your bed, dresser, or bookshelf to ensure they don’t interfere with potential desk placement.
Next, think about your daily routine and how the space will support it. Decide if your desk will face the window to maximize natural light or if facing away to minimize glare. Assess whether you need open walkway space around your desk because a clear path reduces accidental bumps and improves safety.
Use masking tape on the floor to mark potential desk spots because this prevents you from discovering after setup that your monitor will block the door or that you’re walking into a maze when working. To do this, measure the desired desk dimensions and tape them out on the floor, ensuring enough space for movement and accessibility.
Key measurement fact: The ideal distance between your eyes and the monitor is 20 to 30 inches, with the top of the screen positioned at or just below eye level to prevent neck strain. Additionally, considering ergonomic setup ideas can help you optimize your workspace for comfort and productivity.
Here’s the thing: planning for future additions isn’t just about squeezing in extra stuff later it’s about making sure your space actually allows for it without turning into a cluttered mess. You might want an extra monitor, a speaker, or even a mini fridge. Think ahead. A well-measured workspace can support workspace capacity upgrades and ensure stability when adding new equipment.
Before you hit “buy,” double-check your measurements because it’s the step most people skip and end up wishing they hadn’t. You’ve held a tape measure in one hand and realized the desk won’t fit in that tight corner where you swore it would. All right, measure again, slow and deliberate, because accurate measurements prevent costly mistakes.
Measure the height, width, and depth of your intended space to ensure the furniture fits comfortably. For example, if your desk’s maximum width is 60 inches, verify that the available space exceeds this by at least 2 inches on each side for easy maneuvering.
Ensure your space provides at least 2 inches extra on each side of your furniture for easy fitting and movement.
Now, check your doorway and clearance because you’ll want to roll your desk in without knocking over the lamp or scraping paint. Measure the width of your doorway, including trim, and compare it to the widest dimension of the furniture.
Highlight:
* Ensure your doorway clearance exceeds the furniture width by at least 2 inches to prevent difficulties during delivery.
Don’t rely solely on generic specifications because measurements vary based on your setup. Double-check specific area dimensions and ensure the space can accommodate the furniture’s full movement and assembly clearance.
Remember these common mistakes:
To handle awkward or irregular rooms, you’ll want a flexible approach.
Start by sketching the space, noting every nook and cranny. Use painter’s tape or masking tape to mark potential desk spots (trust me, it’s easier than trying memory). Measure each segment, especially weird corners or alcoves, and record those.
Sometimes, a custom solution or smaller desk fits better think of it as room’s quirks working in your favor.
The best method? Use a measuring tape or laser measure, starting at one corner and stretching across each level or split room. You’ll want to jot down measurements for each section, making sure to account for doorways or archways blocking the flow.
All right, now you might think, “This sounds tedious,” but trust me, sketching a quick floor plan first keeps you from measuring twice.
Good luck!
You measure for wall moldings or baseboards by taking the measurement from the floor up to the top of the molding. Then, subtract that height from your total desk height, so your surface clears everything.
All right, just remember: don’t forget to account for uneven moldings or baseboards sometimes they stick out or dip in so measure multiple spots, and choose the shortest one to keep things nice and neat.
All right, to keep your measurements accurate over time, invest in a good laser measure or a sturdy tape because, obviously, those paper measurements tend to drift, especially if you move furniture.
Record your measurements in a digital note or spreadsheet, so you don’t rely on memory.
Check your measurements every few months life happens, doors swing open and a tiny shift can cause big issues when setting up your desk.
You’ll want a laser distance measurer or a flexible tape, honestly. Laser tools are precise and quick perfect for tricky, uneven ceilings, and you won’t have to crawl on your hands and knees like with tapes.
Just aim, click, and read the digital display. Avoid guessing non-standard heights trip folks up, and trust me, a quick, accurate laser reading saves a ton of frustration when fitting that desk.
All right, so you’ve measured, marked, and double-checked pretty much nailed it, right? Remember, it’s a lot like assembling furniture: the manual says 20 minutes, but you’re still trying to find that one missing screw. Just trust your measurements, visualize the space, and don’t rush. When your standing desk finally slides into place, you’ll thank yourself for not skipping that step. Good luck and hey, no more bumping elbows on your wall!


