Physical Address
304 North Cardinal St.
Dorchester Center, MA 02124
Physical Address
304 North Cardinal St.
Dorchester Center, MA 02124

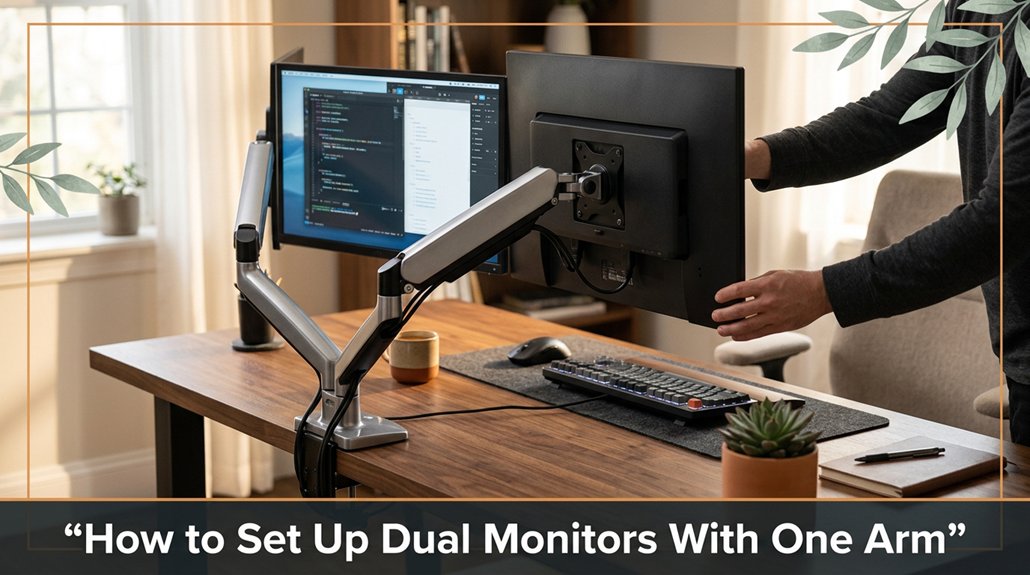
Setting up dual monitors on one arm can feel like a logistical puzzle, especially when your desk space, monitor weights, and VESA patterns don’t quite line up. It’s frustrating to get everything just right, only to realize the setup isn’t as secure or comfortable as you’d like.
But don’t worry if you choose the right arm and follow a few straightforward steps, you’ll have a tidy, efficient workspace in no time. First, pick a sturdy, adjustable arm designed for two screens, like the Ergotron LX.
Then, check your monitors’ VESA compatibility and weight limits most are around 17.6 lbs. Attach the mount, clamp it securely no overtightening and position the monitors so they sit directly in front of you, at eye level. Manage cords to keep your desk tidy, and remember patience beats frustration. Keep a few extra screws handy, and if you stick with me, you’ll master this setup with less hassle.
This article contains affiliate links. If you purchase through them, I may earn a small commission at no extra cost to you. I only recommend products I genuinely believe in.
Sure, setting up dual monitors with just a single monitor arm might sound like a math problem from a different era, because why complicate things? But trust me, the dual monitor setup with one arm is surprisingly straightforward once you get the hang of it.
You’ve probably held a monitor arm in one hand, trying to tighten the clamp with the other, only to realize it’s not quite fitting. Here’s the trick: pick a sturdy, adjustable arm designed for dual screens, such as the Ergotron LX Dual Stacking Arm or the Huanuo Dual Monitor Mount.
Choose a sturdy dual monitor arm like Ergotron LX or Huanuo for a seamless, stable setup.
Attach it securely to your desk because stability is essential to prevent wobbling or undue strain on the arm. Measure your desk’s thickness and monitor weight limits beforehand.
A solid setup involves balancing the monitors so they don’t wobble or exert excessive pressure on the arm.
Important measurement fact:
– Monitor weight should be within the arm’s maximum load capacity, typically around 17.6 lbs (8 kg) per arm.
To ensure ergonomic comfort, raise each monitor until the top of the screen is at or just below eye level, which is approximately 20 to 30 inches from your face.
Another key factor is monitor positioning, which helps reduce neck strain and improves your overall workflow.
Steps for setup:
Choosing the right single monitor arm isn’t just about picking the first one that looks good or is on sale. Trust me, I’ve been there holding a clamped arm in one hand, trying to tighten a screw with the other, wondering if I missed something obvious. Here’s what to watch for:
Additionally, verify that the monitor arm supports the support range suitable for your monitor size and weight to avoid sagging or wobbling issues.
All right, pick smart, and you’ll be set before you finish your coffee.

When it comes to evaluating monitor compatibility for a single-arm setup, the first thing you need to do is check the VESA mount pattern on your monitor because this detail is often buried in the manual or on the back of the monitor, and it’s not always obvious.
All right, look for four screw holes in a square or rectangle pattern, usually 75x75mm or 100x100mm.
No pattern? You’re out of luck and need a different monitor or an adapter.
Now, here’s the thing measure those distances because sometimes, what the manual claims and what you see in real life differ.
Measured VESA pattern dimensions:
Making sure your monitor can attach securely saves a lot of frustration later when you’re juggling that heavy panel.
To ensure secure attachment, verify the VESA pattern matches the mount’s specifications exactly, and measure the distance between the mounting holes with a ruler or caliper.
Additional Tips:
Common Mistakes to Avoid:
You’ve got your monitor arm in hand, the desk all cleared off at least temporarily and you’re probably thinking, “This should be straightforward.” Spoiler alert: it often isn’t.
Ever been halfway through setting up your dual monitors only to realize they look like they’re in a tug-of-war? Yeah, I’ve been there. Here’s the thing: your monitors should sit directly in front of you no neck-breaking angles or squinting.
Start by adjusting your arm so each monitor is roughly at eye level because positioning the screens at this height reduces neck strain and promotes comfortable viewing. Raise the monitor until the top of the screen is at or just below your eye level for optimal ergonomics.
Position the monitors so they’re close enough to glance from one to the other without turning your head excessively because this minimizes discomfort and maintains a natural line of sight.
For the best view, angle each monitor inward slightly, forming a gentle curve about 15 to 30 degrees from your central line. This inward tilt reduces strain on your neck and eyes and keeps both screens within your natural line of sight.
Important Measurement: The optimal distance between your eyes and each monitor should be approximately 20 to 30 inches, which is roughly an arm’s length. Maintaining this proper monitor positioning is crucial for neck pain relief and overall comfort.
Common Mistakes to Avoid:
Alright, now that your monitors are looking straight and hugging each other in that perfect curve, it’s time to tame the chaos behind the screens. You’ll want those cables under control, or else you’ll be wrestling with them every time you reach for your coffee.
Adjusting your monitor height and angle might sound straightforward, but many small tweaks can significantly reduce neck and eye strain. Trust me, I’ve been there holding the monitor arm open in one hand while trying to tighten a clamp with the other, wondering why nothing lines up.
First, set your monitor so the top of the screen is at or just below your eye level. This position prevents craning your neck upward or drooping downward, which can cause fatigue and discomfort.
Set your monitor so the top of the screen aligns with or is just below your eye level for comfortable viewing.
Use the following formula to determine the proper monitor height:
Monitor top edge should be approximately at or slightly below your eye level when seated comfortably.
Next, tilt the screen slightly upward or downward depending on your sitting position because a tiny tilt helps reduce glare and reflections.
Most people prefer a slight upward tilt of about 10 to 15 degrees; however, adjust based on your individual viewing angle and lighting conditions.
Your eyes should look directly at the middle of the screen, not up or down. To achieve this:
– Adjust the monitor’s tilt and height until your gaze falls naturally onto the center of the display when sitting upright with your back supported.
Remember:
Avoid common mistakes such as:
When you’re mounting that monitor arm and everything’s been laid out on your desk, the last thing you want is for it to wobble or come swinging down before you even get to enjoy your new setup. Here’s how to keep it stable and safe:
Fact:
Monitor top aligned with eye level at 20–30 inches from your face minimizes neck strain and promotes ergonomic comfort.
Avoid these common pitfalls:
Troubleshooting issues with dual monitors on a single arm can feel a lot like trying to juggle flaming torches: you think, “How hard can it be?” but somehow, something always flicks and burns out.
First, check your monitor weight limits because exceeding the arm’s maximum weight capacity causes sagging or tilting. Typically, a standard dual monitor arm supports up to 17.6 pounds per monitor, but verify your specific model’s specifications.
Tighten every screw firmly, but avoid over-tightening to prevent stripping the threads. Loose screws can cause instability, leading to wobbling or uneven screens.
Sometimes, a tiny misalignment causes instability. If your monitors wobble or appear uneven, loosen and reposition the monitors to ensure they’re aligned properly.
Loosen and realign monitors to fix wobbling and achieve stability.
All right, if your monitors aren’t aligning properly, loosen the mounts and reposition the monitors until they’re at the correct height and angle. This ensures a stable and ergonomic setup.
And don’t forget your cables matter. Overly long or tangled cords can pull your setup out of whack, causing instability or strain on the connectors.
To optimize cable management, use cable clips or sleeves to keep cables straight, untangled, and within 3 feet of slack from the monitor to the port. Excess slack or tangled cables can pull on the monitors and disrupt alignment.
The key to successful dual monitor setup: patience, small adjustments, and remembering that even the best plans sometimes need a little tweak.
If you’re going to be spending hours in front of your dual screens, you’ll want to make sure they’re not secretly trying to ruin your neck and back.
First, raise your monitors so that the top of the screens is at or just below eye level because looking slightly down reduces strain on the cervical spine.
Second, position your monitors approximately 20 to 30 inches from your eyes, because this distance helps prevent eye strain and encourages comfortable viewing.
Third, place the monitors close enough to avoid neck turns your line of sight should cover both screens without moving your head from side to side.
Fourth, ensure the center of each display is directly in front of you, not off to the side, to maintain a neutral neck position.
Fifth, adjust brightness and contrast to a comfortable level; this prevents eye fatigue caused by overly bright or dark screens.
Finally, take regular breaks every 20 minutes, look away from the screen for at least 20 seconds, and every hour, stand up and stretch, because your eyes and muscles will thank you.
Remember: ergonomic adjustments are essential for work survival, and not just health tips.
Getting your monitors and their mounts to stay put long-term isn’t as simple as screwing a few things in and calling it a day. I’ve been there, holding a monitor arm with one hand, tightening a clamp with the other because I skipped a step or underestimated the weight.
First, check the mount’s weight limit because you don’t want to overdo it. Ensure the weight of your monitor doesn’t exceed the mount’s specified maximum payload, which is typically listed in pounds or kilograms.
Always verify your mount’s weight capacity to prevent instability and ensure safe, lasting support.
Next, tighten the screws firmly because loose screws can cause instability over time. Be careful not to crush the mount or screw into drywall without anchors, as this can lead to slipping or falling. Use appropriate drywall anchors if mounting on drywall to distribute the load evenly.
Now, regularly check the tightness of all screws and clamps because everything loosens over time with regular use.
Additionally, dust buildup and temperature changes can affect the stability of your setup. Clean the mount and monitor mounting points periodically, and tighten screws as needed.
A well-maintained setup stays sturdy, not falling apart during important meetings or extended work sessions.
Yes, you can mount two monitors on a single arm, but check the compatibility first.
You need a multi-monitor arm with a VESA plate that supports your monitor sizes and VESA patterns.
All right, here’s the thing: most dual-monitor arms are designed for standard VESA mounts, so if your monitors have different VESA sizes or weight capacities, you’ll need adapters or a different setup.
Usually, the key is matching VESA patterns and weight limits.
Most dual-monitor arms handle around 17 to 19 pounds per arm.
Think of it as a balancing act if you push beyond, you risk sagging or even snapping the arm.
All right, so check your arm’s max weight capacity, then add up your monitor weights, including mounts and cables.
If you’re close or over, consider a beefier arm.
Trust me, you don’t want your screens doing the limbo mid-work.
You prevent monitors from overlapping by adjusting their arms’ tilt and rotation first.
Space them apart on your desk, then set each monitor to the desired angle, making sure they swing evenly.
All right, the key is to use the monitor arm’s adjustments almost like fine-tuning a guitar.
Yes, you can upgrade your existing single monitor arm for dual monitors, but it’s not always straightforward. First, check if your current arm has enough weight capacity and mounting options for two screens.
Usually, you’ll need a dual-arm clamp or a new, sturdier mount designed for two monitors. Sometimes, replacing the arm entirely is easiest not all single arms are built to hold two screens safely. Trust me, I’ve learned that the hard way.
Think of this like assembling a spaceship safety first. You should wear gloves, avoid tight-fitting clothing, and work in a clutter-free zone.
Guarantee your arm is securely clamped to the desk loose connections are asking for a crash landing. Before tightening everything, double-check weight capacities and the monitor’s mounting points.
And obviously, don’t rush; quick hands tend to overlook the obvious, like unplugging cords or guaranteeing stability.
Honestly, setting up dual monitors on one arm isn’t rocket science until you realize the manual’s 20-minute estimate is a total joke. But don’t worry, I’ve been there. The key? Measure twice, tighten once, and remember that stability is king. A sturdy mount keeps your screens safe and your neck happy. Now you’ve got a setup that works. Just don’t forget to double-check your clearance and weight limits you’ll laugh at how simple it actually is.


