Physical Address
304 North Cardinal St.
Dorchester Center, MA 02124
Physical Address
304 North Cardinal St.
Dorchester Center, MA 02124

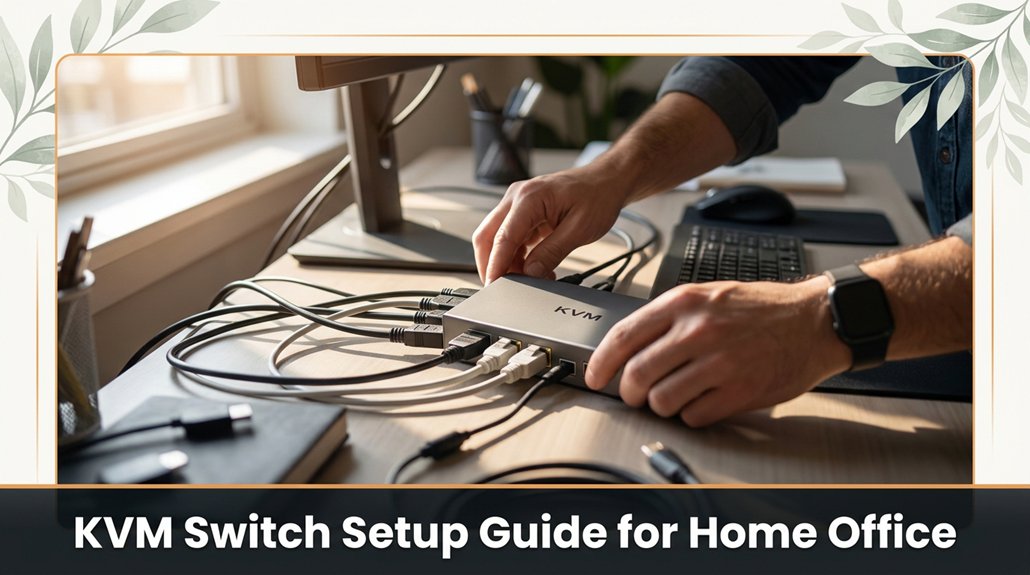
Setting up a KVM switch might feel like troubleshooting a tech puzzle, especially when you’re trying to get all your devices working smoothly. First, choose a flat, accessible spot near your computers and peripherals no hiding it behind the couch!
Connect your video cables, making sure you’re plugging HDMI into HDMI and DisplayPort into the correct port no mixing and matching. Attach the KVM cables, then connect your keyboard and mouse.
Power everything on, and if something isn’t working right, double-check for loose connections or outdated firmware. Keep your cables tidy and label them so you won’t accidentally swap your monitor’s HDMI with your Ethernet cable. Rushing or skipping steps can turn this simple setup into chaos, but follow these steps carefully, and you’ll have your workspace running seamlessly in no time.
This article contains affiliate links. If you purchase through them, I may earn a small commission at no extra cost to you. I only recommend products I genuinely believe in.
Alright, let’s cut to the chase: a KVM switch is fundamentally your tech version of a magic switchboard. When you’re setting up your home office, this device lets you control multiple computers with just one keyboard, mouse, and monitor.
Trust me, it simplifies your life because there’s no more plugging and unplugging HDMI cables every five minutes.
You’ll connect each device to the KVM switch because this allows you to manage multiple systems through a single set of peripherals.
Then, use a button or hotkey to toggle between them.
A KVM switch is especially useful if you’re juggling work and personal computers or have a cluttered desk.
Now, I know what you’re thinking: “That sounds cool, but I’ve been burned by setups that promised simplicity.”
Take a breath because this guide’s all about making it straightforward, even if your desk looks like a spaghetti incident.
Ever wonder what makes one KVM switch better than another? It’s all about features. You want a switch that supports your setup, so check how many ports it has because more ports allow you to connect multiple devices and manage your workspace efficiently.
Next, look for resolution support if you’re plugging in a 4K monitor, don’t settle for 1080p because higher resolution support ensures image clarity and performance suitable for high-definition displays.
Support for higher resolutions like 4K ensures sharp image clarity and optimal performance for high-definition displays.
Check for USB ports make sure there are enough for your keyboard, mouse, and any extras because sufficient USB ports prevent the need for additional hubs, reducing clutter and connection issues.
Mouse switching speed matters faster switching improves workflow because it reduces delay when switching between multiple computers.
Consider compatibility some switches only work with certain operating systems or peripherals because compatibility ensures seamless operation across your devices without unnecessary troubleshooting.
Don’t overlook cable management options good cable management prevents clutter and accidental disconnections because tidy cables improve airflow and maintain system organization.
Specific Cable Management Tip: Use cable ties or clips to route and secure cables along the edges of your desk or behind your monitor stand, keeping the workspace clean and accessible.
In the end, the right features fit your tech and workflow, so choose a KVM switch with the appropriate ports, resolution support, USB connectivity, audio support, compatibility, and cable management options to ensure reliable performance and ergonomic convenience.
When it comes to choosing the best KVM switch for your setup, the process can feel a bit like assembling furniture without instructions, because the instructions are buried in specs and your weirdly specific needs.
You’ll want to take into account how many computers you need to connect, because connecting more devices requires a switch with higher port capacity.
Also, consider the ports you’ll require USB, HDMI, DisplayPort and verify their compatibility with your gear because mismatched ports can prevent proper functionality.
All right, think about your monitors and their resolutions; a 4K switch is unnecessary if all you’ve got are 1080p screens.
Highlight:
– 4K resolution requires a switch that explicitly supports 3840 x 2160 pixels, while 1080p support requires 1920 x 1080 pixels.
Now, speed matters. Look for switches with quick switching capabilities, because slow switching can cause delays or temporary disconnections, leading to frustration.
And don’t forget, versatility is king. Some switches support audio, USB peripherals, or even networking, because integrating multiple functions reduces clutter and simplifies your workflow.
Remember, the right choice simplifies your workflow, because it minimizes the need to manually reconnect or troubleshoot devices.
Whereas choosing improperly can cause headaches and inefficiency.

Setting up your KVM switch might seem straightforward, but it’s often more like trying to solve a Rubik’s Cube while blindfolded, because if you’re not careful, you’ll end up with a tangled mess.
First, find a flat, sturdy spot near your monitors and computers. The surface should support the weight of the switch and allow easy access to all cables.
Next, plug the video cables from your computers into the switch these are usually labeled clearly, but it’s important to double-check to ensure the correct connections. It’s common to mistake the input and output ports, which can prevent proper display functioning.
Double-check video cable labels to avoid confusing input and output ports for proper display setup.
Then, connect the KVM cables from the switch to each computer. Because connectors can vary, check the connector shape and ensure it matches the port; forcing incompatible connectors can damage the ports or cables.
Step 1: Connect the video cables from your computers to the switch because this provides the display signal for each machine.
Step 2: Connect the KVM cables from the switch to each computer, ensuring the connectors fit securely and correctly.
Next, plug your peripherals keyboard and mouse into the designated ports on the switch because this allows you to control all connected computers from a single set of peripherals.
Finally, power everything on. Turn on your computers and the switch, one after the other, verifying that each device recognizes its connection.
Remember to keep your patience handy, because configuring KVM switches is rarely as quick as the manual suggests. It often takes troubleshooting and adjustments, especially if cables aren’t labeled clearly or connectors don’t seat properly.
Important: When setting up your workspace, position the monitors with the top of the screen at or just below your eye level about 20 to 30 inches from your face to reduce neck strain and improve ergonomics. Also, ensure that your office workstation setup adheres to OSHA ergonomic guidelines to promote comfort and safety.

Connecting multiple devices to your KVM switch might seem as simple as plugging in a few cables, but you may encounter peripherals or cables that don’t cooperate. You’ll face tangled messes resembling spaghetti or cables that sneak behind furniture.
To keep your setup manageable, follow these tips:
Important Measurement Tip:
– Leave at least 4 inches (10 centimeters) of slack at each connection point to accommodate movement and prevent strain.
All these practices help transform your setup from a tangled mess into a sleek, efficient command center.
No doubt, your KVM switch isn’t working as expected, even though you’ve followed all the instructions to the letter, probably.
Here’s the thing: troubleshoot methodically. First, check all connections; make sure the cables are snug because loose cables are the most common culprit.
All right, if your monitor stays blank, try swapping those cables with a known-good one because sometimes, it’s the simple stuff.
Now, make certain the switch recognizes your devices; this often means pressing the correct hotkey or button, which might be different from what the manual says.
Look, if you’re still stuck, unplug everything, wait a few seconds, then reconnect because sometimes, these switches need a fresh start.
Important: Your system should detect devices automatically, but it’s apparent sometimes it just doesn’t.
Once you’ve connected your KVM switch and devices are recognized because, honestly, that’s half the battle you’ll want to develop a few habits to keep things running smoothly.
First, label your cables; doing so makes the messy maze easier to navigate later, especially when troubleshooting or upgrading components.
Label your cables to easily troubleshoot and upgrade your setup later.
Next, assign each device a dedicated button or hotkey trust me, manually clicking through devices is a recipe for frustration because it slows down workflow and increases the chance of selecting the wrong device.
Keep your firmware updated; manufacturers frequently release patches that fix bugs or add compatibility improvements, which is crucial for optimal performance.
Additionally, avoid unplugging devices randomly; always power them down properly to prevent glitches or data corruption caused by unexpected disconnects.
If your KVM switch supports multi-monitor setups, set up profiles or layouts. Because switching without predefined arrangements can cause confusion, configuring screen arrangements makes transitions seamless and preserves your workflow.
Think of it as giving your setup a little routine less chaos, more control.
Important Fact: Position monitors so the top of the screen is at or just below your eye level to prevent neck strain.
For example, a typical ergonomic height places the monitor’s top edge approximately 2-3 inches below eye level, which is about 20 to 30 inches from your face, depending on your height.
Additionally, maintaining the correct monitor height can directly prevent or cause neck pain, emphasizing the importance of proper positioning.
Yes, a KVM switch can support wireless peripherals, but it depends. Most switches connect wired devices directly, and wireless peripherals often use USB or Bluetooth.
For Bluetooth, you’ll need a switch that supports Bluetooth pass-through or a hub between the switch and your device. Just know, most standard KVMs aren’t designed explicitly for wireless, so expect some extra setup, maybe troubleshooting.
Don’t assume it’s plug-and-play; sometimes, it’s more like plug-and-pray.
You’ll probably want a powered KVM switch for multiple monitors, especially if you’re running two or more.
Think of it like an amplifier for your signals without power, your monitors might get wonky or only show part of the picture. I’ve been there.
Powered switches give you consistent data flow, no matter how many screens you connect.
Trust me, going unpowered? It’s like trying to run a marathon in flip-flops.
You’ll want to visit your KVM switch manufacturer’s website obviously, that’s the place for firmware updates.
Download the latest firmware file, and follow their specific instructions sometimes it’s a USB upload, other times it’s a web interface.
All right, don’t get impatient; updates can take a few minutes.
Just make sure your switch stays plugged in and powered, and don’t unplug it halfway through trust me, that’s a recipe for chaos.
Imagine a hacker intercepting your keyboard data sounds like a spy movie, right?
Using a KVM switch can expose you if it’s compromised or outdated firmware, which might’ve vulnerabilities. All right, you should update firmware regularly, use secure cables, and choose switches with encryption.
Trust me, a breach could mean someone knows your passwords or e-mails before you even realize. Stay vigilant so your setup isn’t “hacked in the background.”
KVM switches can work with gaming consoles too, but here’s the catch: most are designed for computers, so you’ll need one with the right ports HDMI or DisplayPort.
All right, you connect your console’s video and audio outputs, then the switch behaves like a middleman.
Just remember, most switches don’t handle game controller signals, so you’ll switch video, but your controller stays plugged into the console. Keep that in mind!
Alright, so setting up your KVM switch is like assembling furniture you think it’ll take 20 minutes, and somehow it ends up feeling like an all-day project. But once you get the cables right and learn a few tricks, it’s smooth sailing, like gliding through open water. You’ll switch between devices without breaking a sweat, and suddenly your desk looks less like a spaghetti junction. Trust me, it’s worth those initial headaches just like that elusive perfectly tight monitor clamp.


